

This guide applies to ShiftUp 3.294.0 and later. The setting is off by default. You need an administrator with ShiftUp Admin and Salesforce’s Manage Flow permission to configure it.
Enable the flow
Configure and check your override in a sandbox before enabling it for your team. If you already use Before Create, review which defaults need to move first.- Open ShiftUp Admin → Advanced → App Settings.
- Find the Pipeline Agents & Workspace section.
- Turn on Enable Account Creation Flow.
- In a Pipeline agent’s Agent results, open an Account choice and select Create new account to see the form.
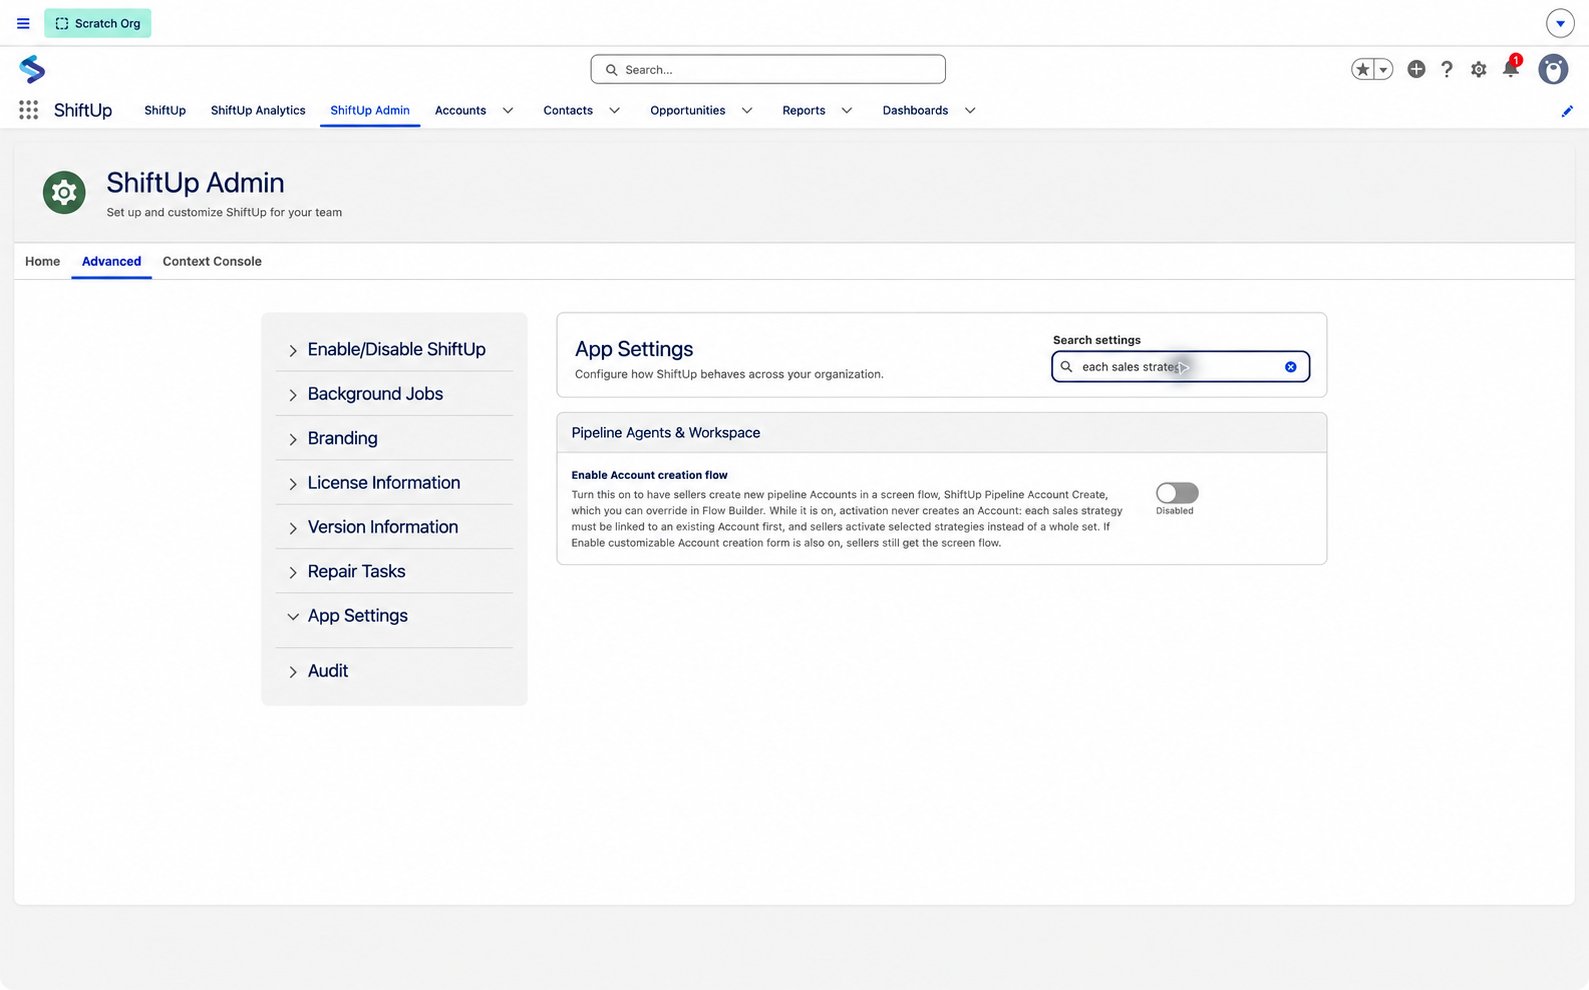
Enable Account Creation Flow controls the screen flow. The customizable form is a separate setting.
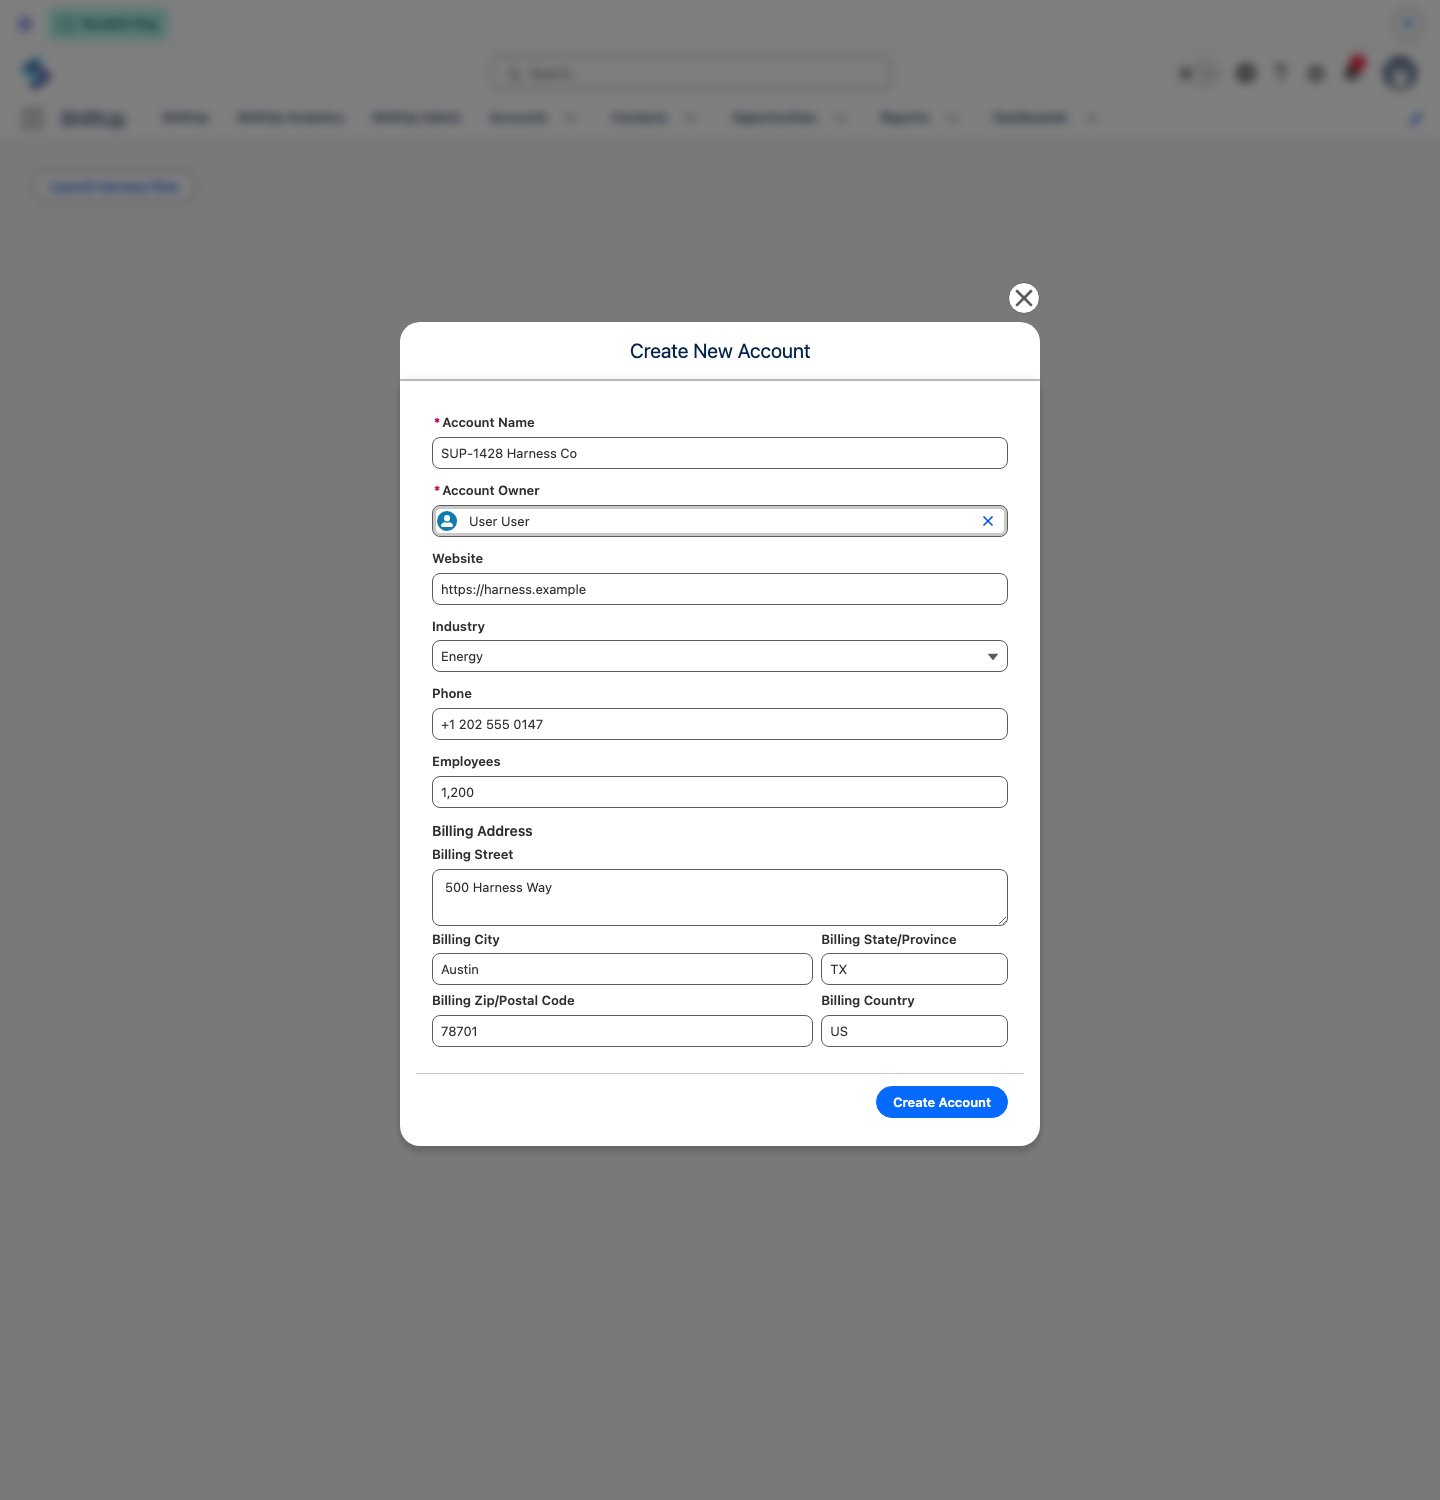
The standard screen flow, shown with sample data in a Salesforce test org.
Check seller access
Sellers need permission to create Accounts and access the fields you add. ShiftUp Admin, ShiftUp Manager, ShiftUp Seller, ShiftUp Restricted Seller, and ShiftUp Pipeline Agent Manager include access to the packaged flow and its record type actions. Sellers can run the flow with their seller permission set alone. Creating or editing an override still requires Manage Flow. If you restrict access to your custom override, grant the sellers access to that override through an appropriate permission set. The flow runs as the seller, so Salesforce permissions, validation rules, and duplicate rules still apply. If a seller chooses another owner, Salesforce sharing must still let that seller see the created Account so ShiftUp can link it to the strategy.Customize the form
A flow override is your organization’s editable version of the packaged flow. Salesforce runs your active override when ShiftUp opens the standard flow.1
Open the correct flow
In Salesforce Setup, search for Flows, then open ShiftUp Pipeline Account Create.This is the Screen Flow. The similarly named ShiftUp Pipeline Account Before Create has a different purpose, explained below.
2
Save a linked override
Click Save As New Flow. Give it a clear label, such as Custom ShiftUp Pipeline Account Create.The save dialog should say the new flow overrides the packaged flow. Save it and confirm the Override badge in Flow Builder. An unrelated flow with a similar name will not be used automatically.Keep the original flow’s resources, Account creation step, returned Account ID, and error-handling connections. Also keep the Get Person Account Record Types and Set Account Record Type actions and their input and output mappings. They handle the seller’s record type choice, and your override can save and activate with them in place. You will add to these in the next steps.
3
Open the New Account screen
On the flow canvas, select the New Account screen and choose Edit. This is the form the seller sees.
Example: require an Account Number
Suppose your team wants sellers to enter an Account Number of 5–40 characters, such asACME-001, before creating an Account. This example uses Salesforce’s existing Account Number field, so you do not need to create a custom field to follow along.
1. Add the field to the screen
The Flow Builder screenshots show an example being configured in a scratch org. In your org, make these changes in the linked override created above. In the New Account screen editor, drag a Text component from the Components panel onto the form. Configure it as follows:
The label is what sellers see. The API name is how the flow identifies this input; keep it exactly as shown if you use the formula below. Under Advanced, keep Use values from when the user last visited this screen so the seller keeps their answer if a save fails.
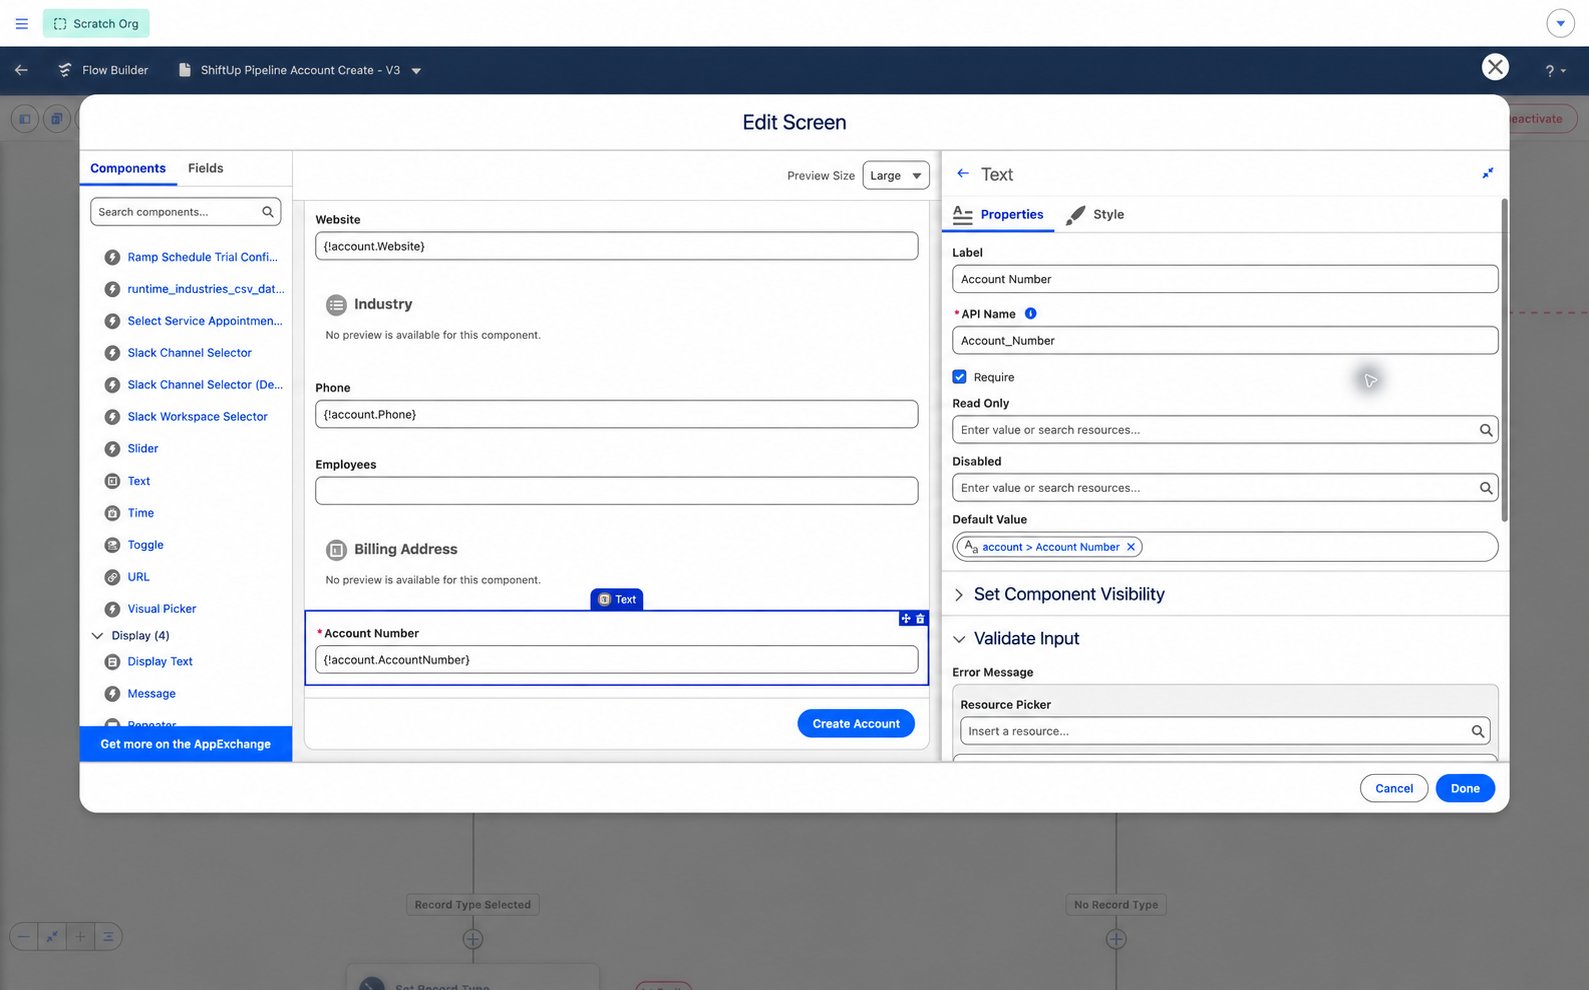
Add a Text component and make Account Number required.
2. Add a friendly validation message
With the Account Number component selected, expand Validate Input. Paste this formula:Enter an account number between 5 and 40 characters, such as ACME-001.This check ignores spaces at the beginning and end when counting characters. The Require setting handles an empty input. The formula handles an entry that is too short or too long.
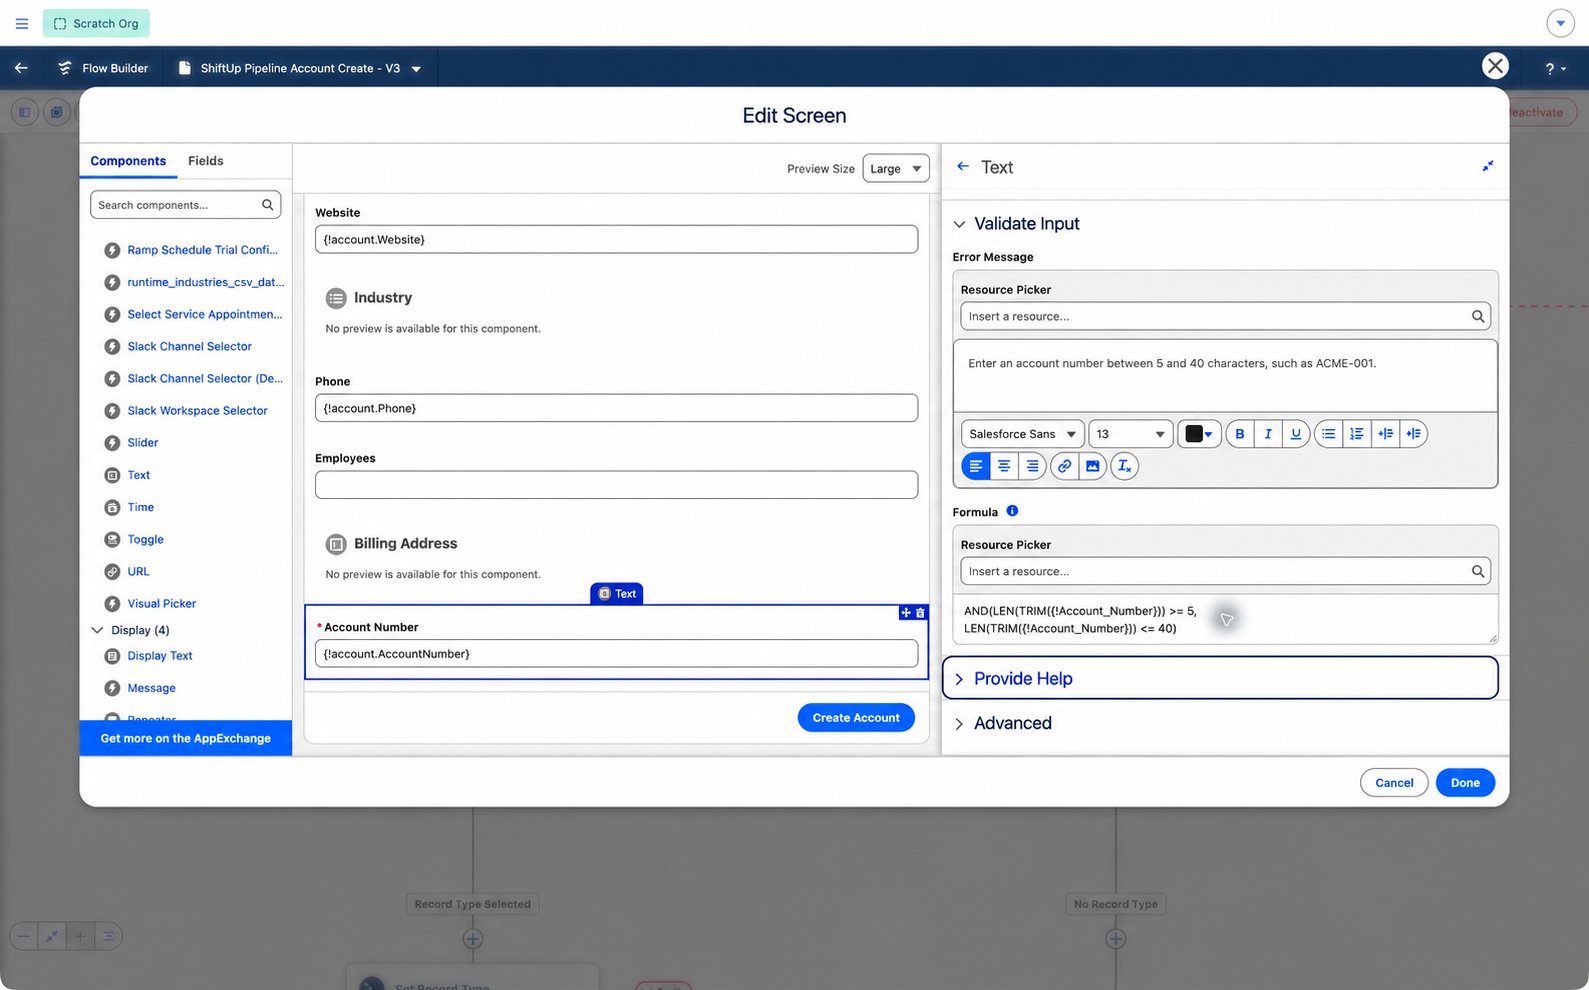
A screen validation formula must be true for the seller to continue.
A screen’s Validate Input formula works differently from an Account Validation Rule: the screen formula is true when the entry is valid. An object validation rule is true when Salesforce should block the save. Use a screen check for immediate guidance here; use an Account validation rule when the requirement must also apply outside this flow.
3. Save the answer on the Account
Adding a field to the screen collects an answer. You also need to tell the flow where to save it. Open the existing Apply Seller Values Assignment element. Add this row, leaving its other assignments in place:
Use the resource picker to select Account Number on the
account record variable, then select the Account_Number screen component as the value.
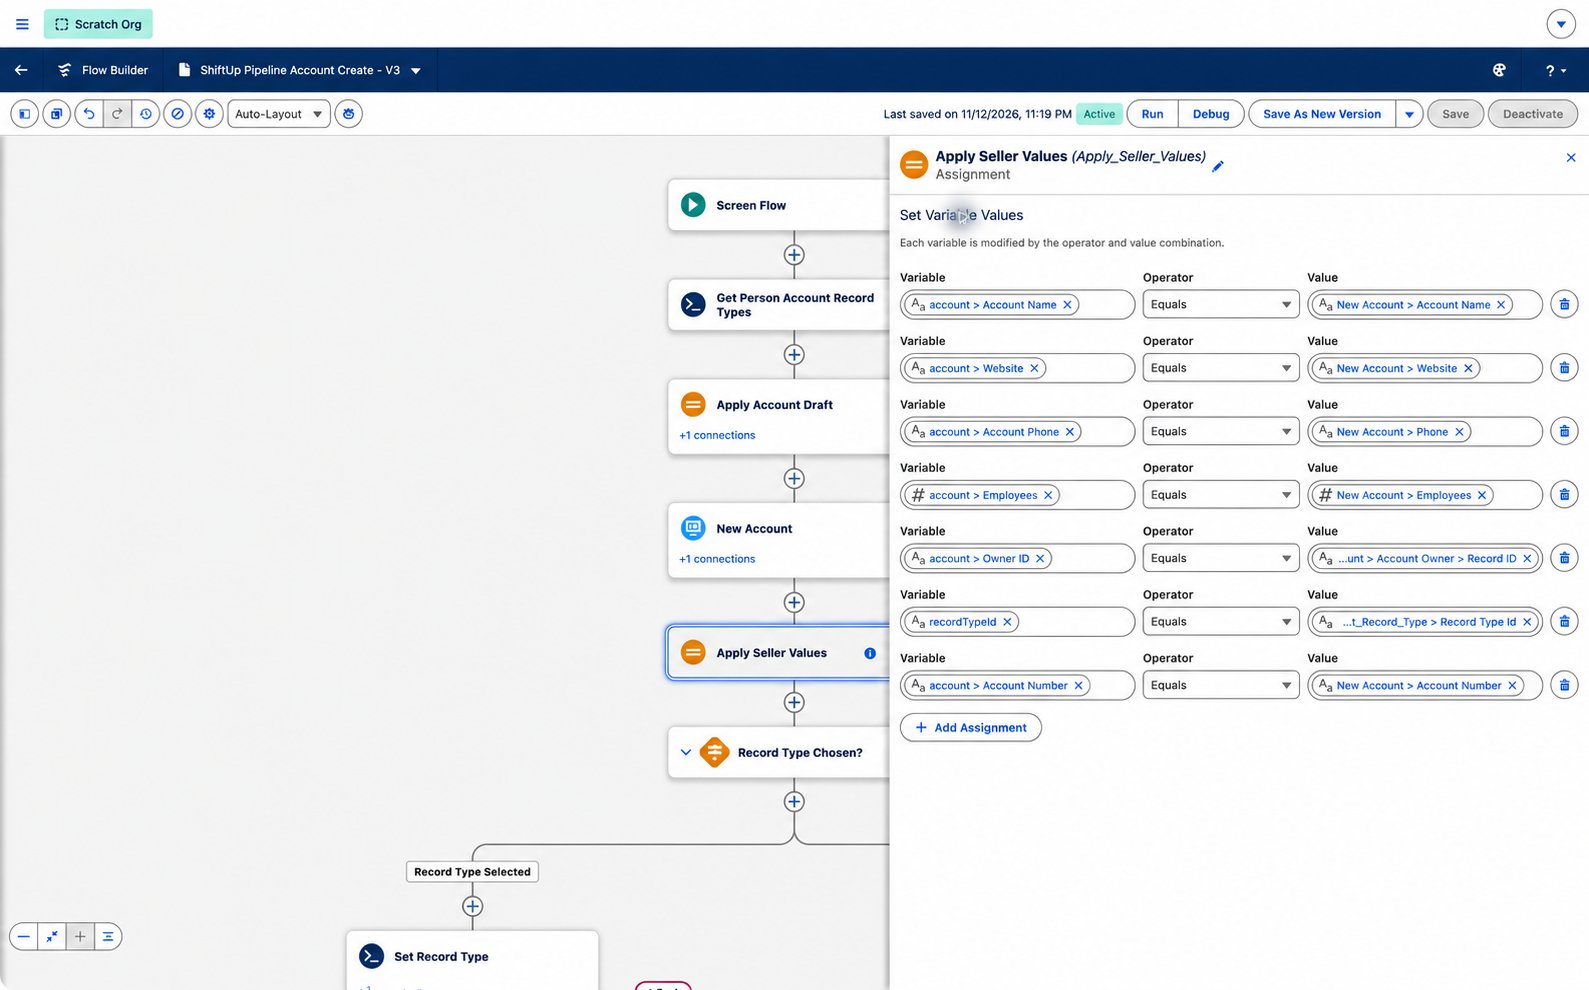
Map the seller's answer to the Account field before Create Account runs.
account instead. For example, an input called Customer_Code would map to account.Customer_Code__c if that is your field’s API name.
The existing Create Account element saves the account record variable. The existing Set Created Account element returns the created Account’s ID to ShiftUp. Keep both steps and the error path that returns the seller to the form if Salesforce rejects the save.
4. Save, check, and activate
Save your override and try it in a sandbox with a seller’s permissions before making it active for your team. Check these examples:
When ready, click Activate on the override. Then open Create new account from a Pipeline agent and confirm your added field appears. A standalone preview does not prove that ShiftUp is using the linked override.
What the seller’s flow looks like
For a fictional company, Acme Manufacturing:- The seller reviews a proposed strategy and opens its Account choice.
- The seller checks for an existing Account. If none fits, they choose Create new account.
- The form opens with the available company details. The seller confirms the owner and record type, then enters
ACME-001in Account Number. - The seller selects Create Account. Your screen checks run, then Salesforce applies its Account rules.
- The flow creates the Account and ShiftUp saves it as the strategy’s Account choice.
- The seller selects the strategy and clicks Activate. If a new parent Account is also needed, they create or choose that parent first.
If you already use the Before Create flow
ShiftUp Pipeline Account Before Create supplies field values when activation creates a new Account. The new ShiftUp Pipeline Account Create screen flow creates the Account earlier, so it is already an existing Account when activation starts. Your Before Create override does not run for that already-created Account. Add any required defaults or checks to your screen-flow override before turning on the setting. See the Before Create flow guide for that separate setup.Troubleshooting and turning it off
To return to the packaged screen flow, deactivate your override. To return to creating Accounts during activation, turn off Enable Account Creation Flow in App Settings. Accounts already created keep their saved values.
Resources to keep when editing the flow
Resources to keep when editing the flow
These resources are already supplied. You do not need to create new ones for the example above.
If you need different screens or defaults for a parent Account,
accountDraft.accountType is Parent for a supporting parent and Target for the Account used by the strategy. This is separate from Salesforce’s Account Type field. Parent drafts may contain only the proposed name and this role, so collect any other required information on the screen.