> ## Documentation Index
> Fetch the complete documentation index at: https://docs.shiftupai.com/llms.txt
> Use this file to discover all available pages before exploring further.
# Customize Standard Object Layouts
To improve adoption of ShiftUp within your organization, we recommend updating some of your standard pages and layouts to include ShiftUp components.
## Update Account Record Page
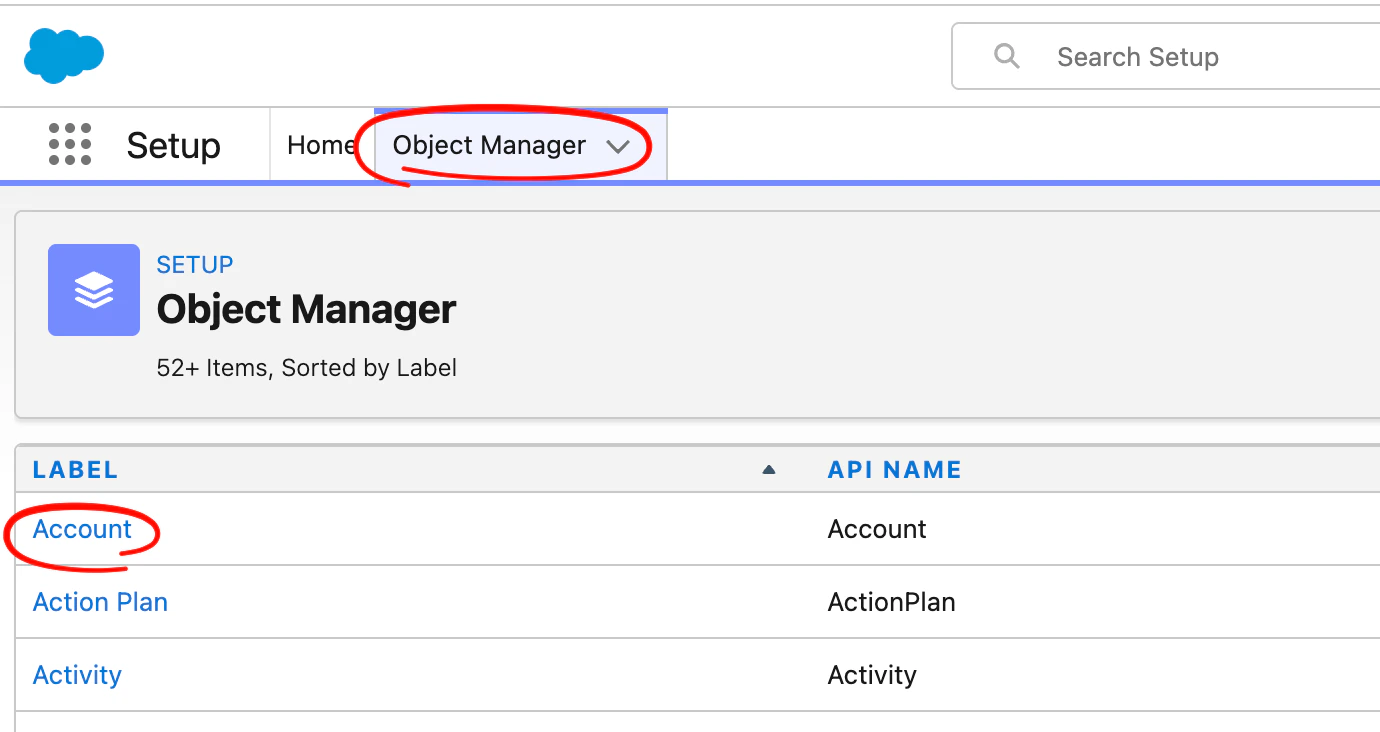
Go to `Setup` , then click on the `Object Manager` tab and click on the `Account` object.
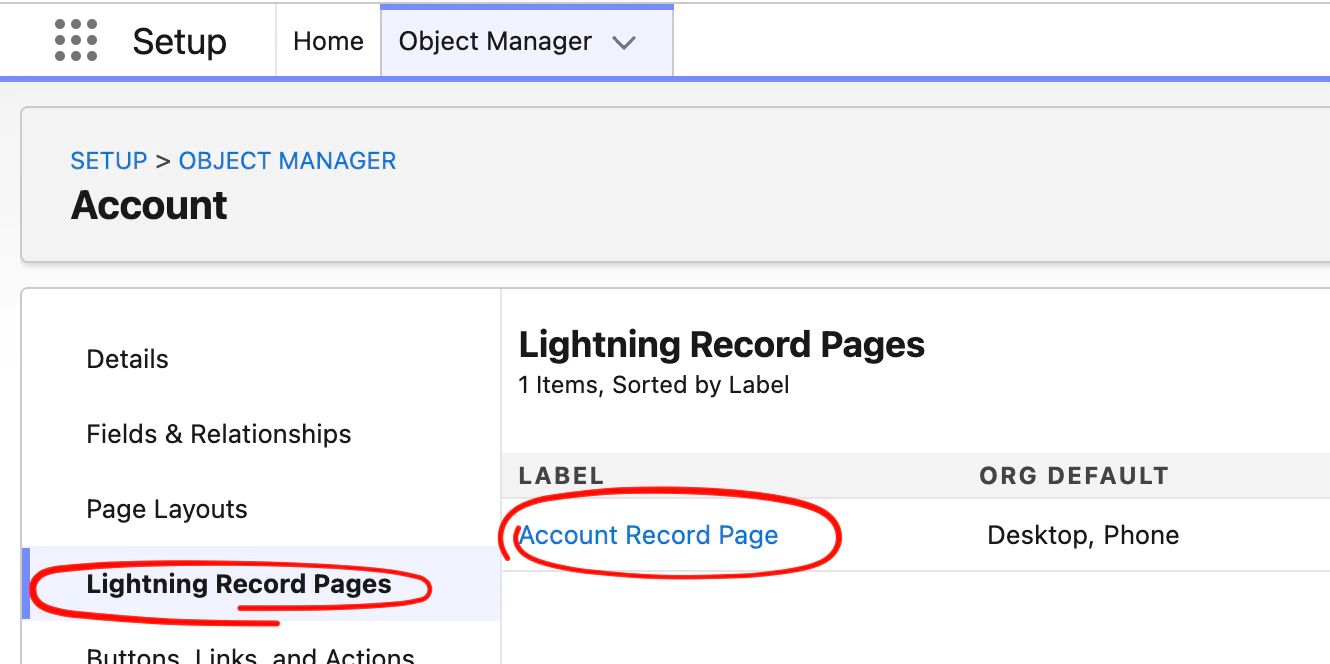
 Next, open the Account record page where you would like to display ShiftUp account plan details
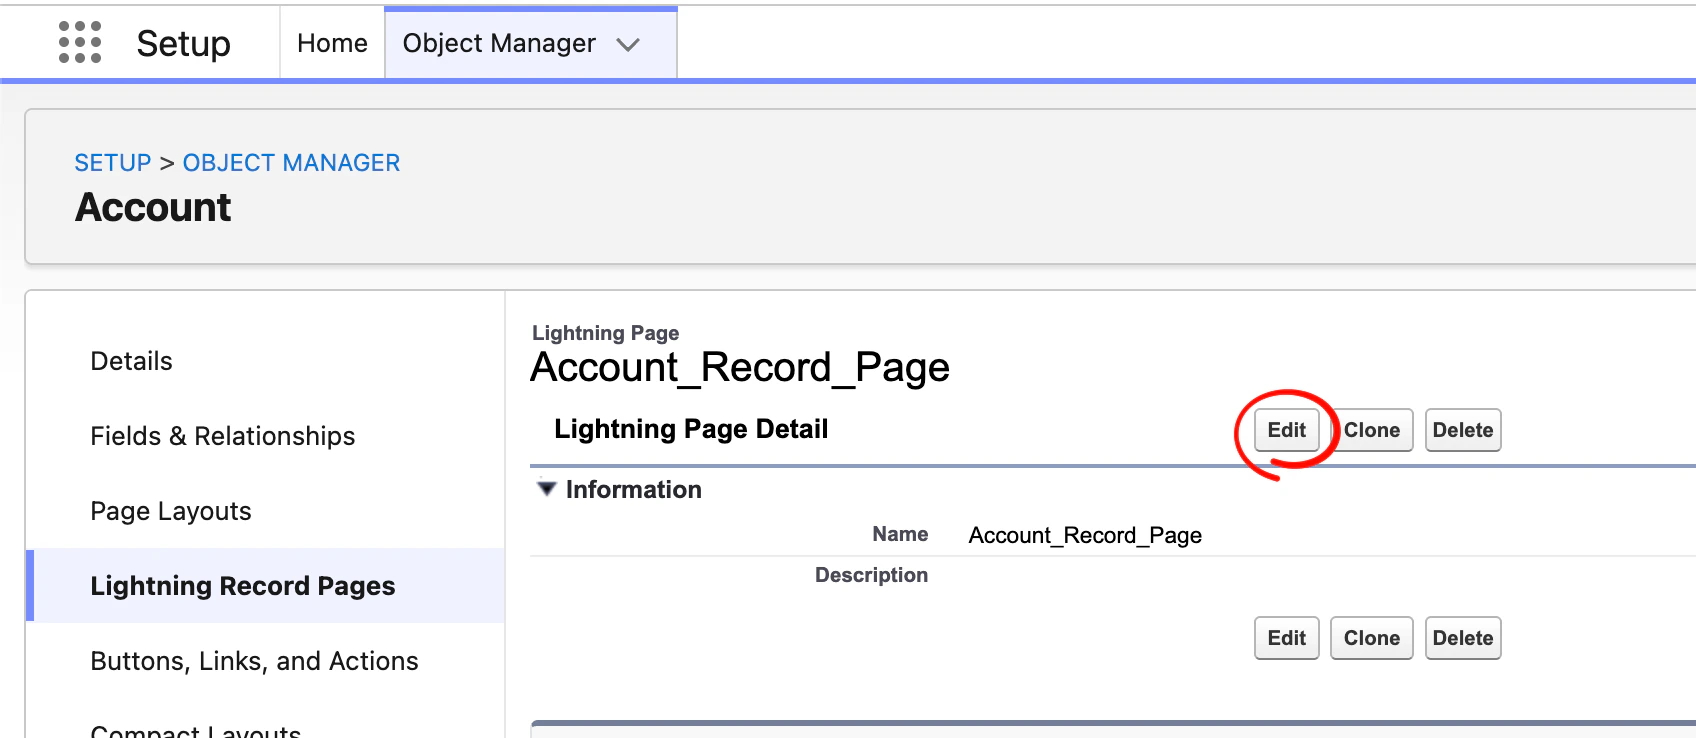
 And click the `Edit` button
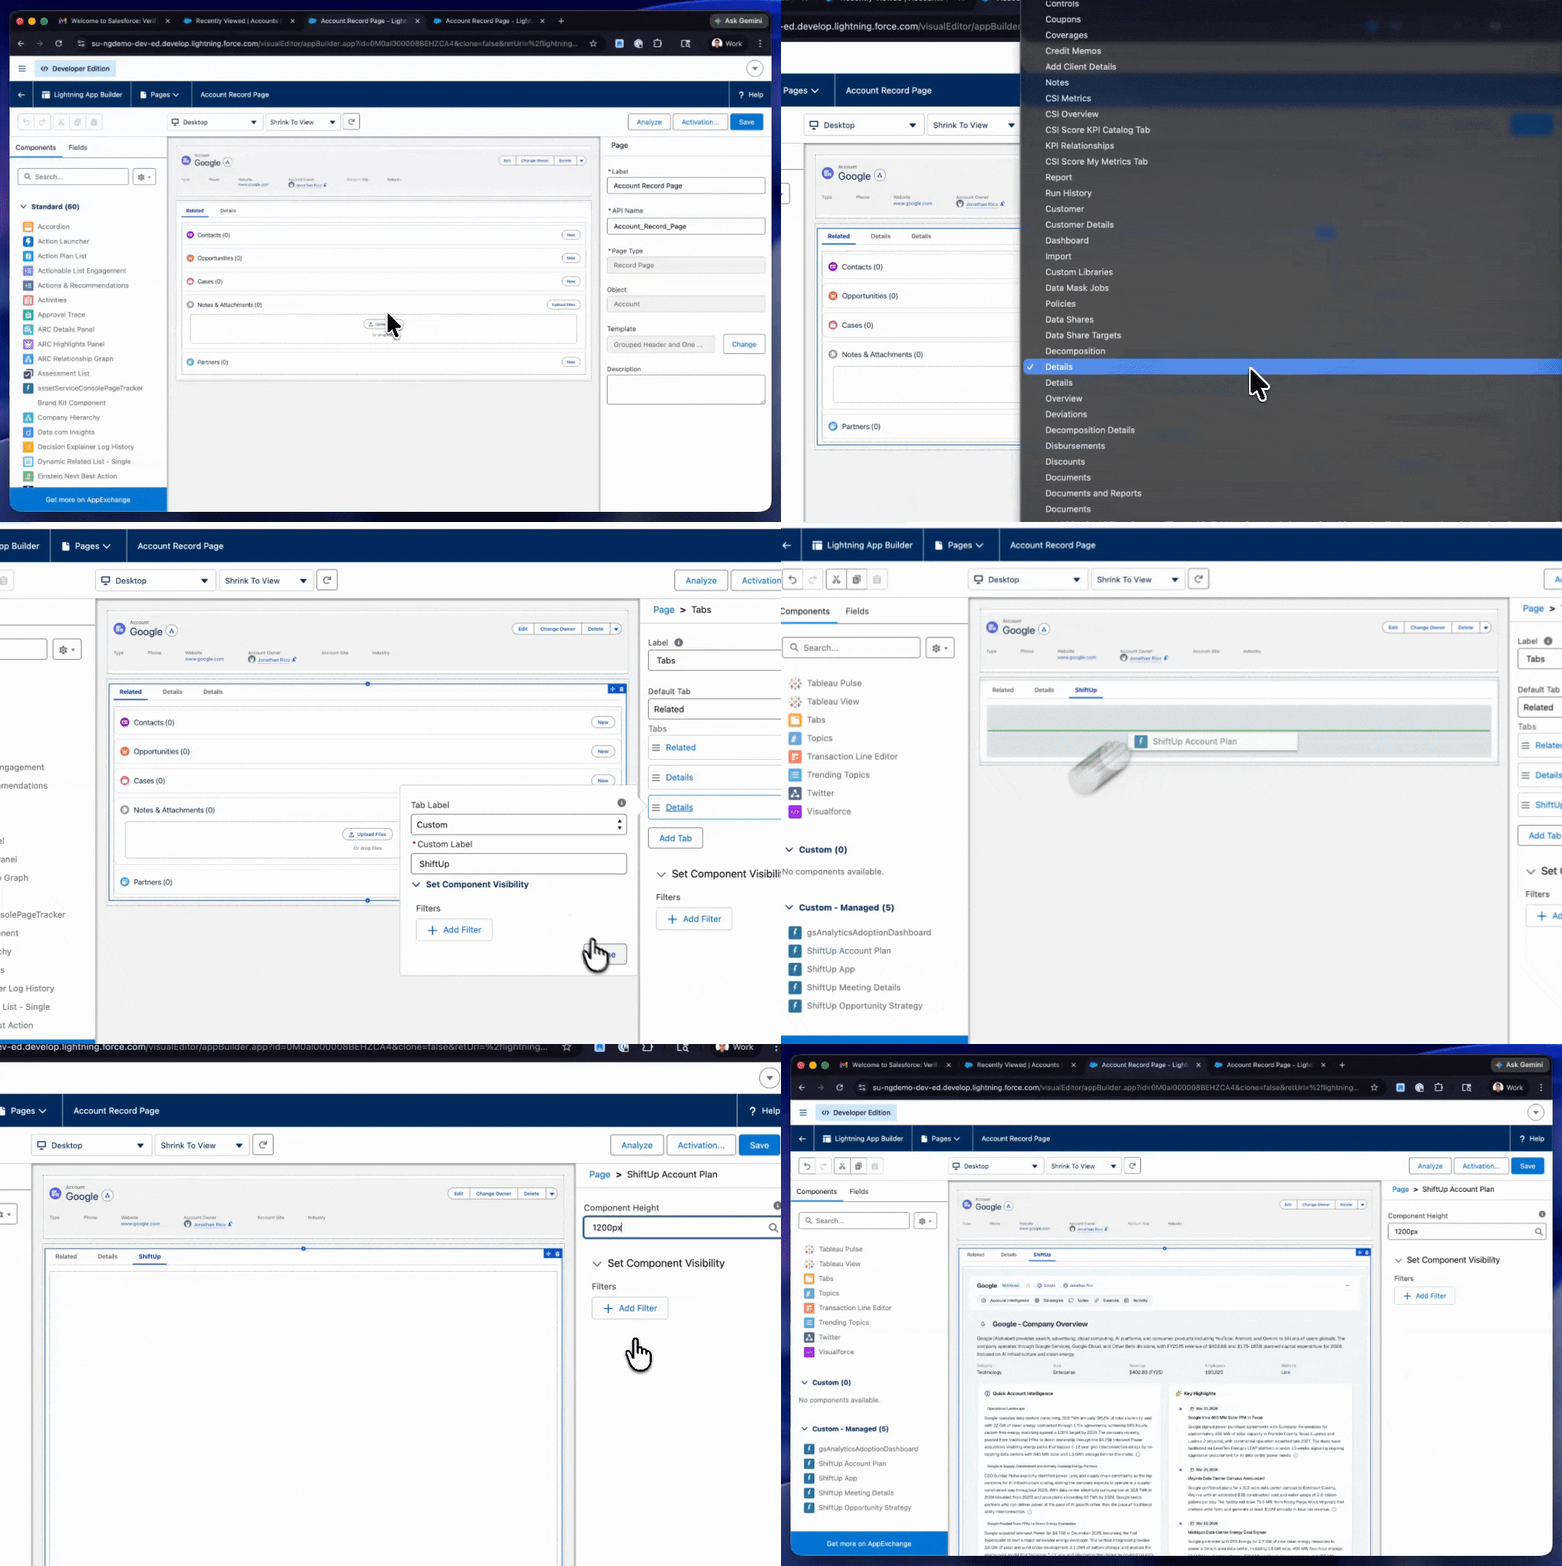
 This will take you to the Lightning App Builder to edit the Account record page. Record pages are very different for each business, so yours may look different. We want to add the `ShiftUp Account Plan` component to this record page, you can decide where you want to add this but we recommend creating a new tab for ShiftUp and dropping the component here.
See sample steps below:
This will take you to the Lightning App Builder to edit the Account record page. Record pages are very different for each business, so yours may look different. We want to add the `ShiftUp Account Plan` component to this record page, you can decide where you want to add this but we recommend creating a new tab for ShiftUp and dropping the component here.
See sample steps below:
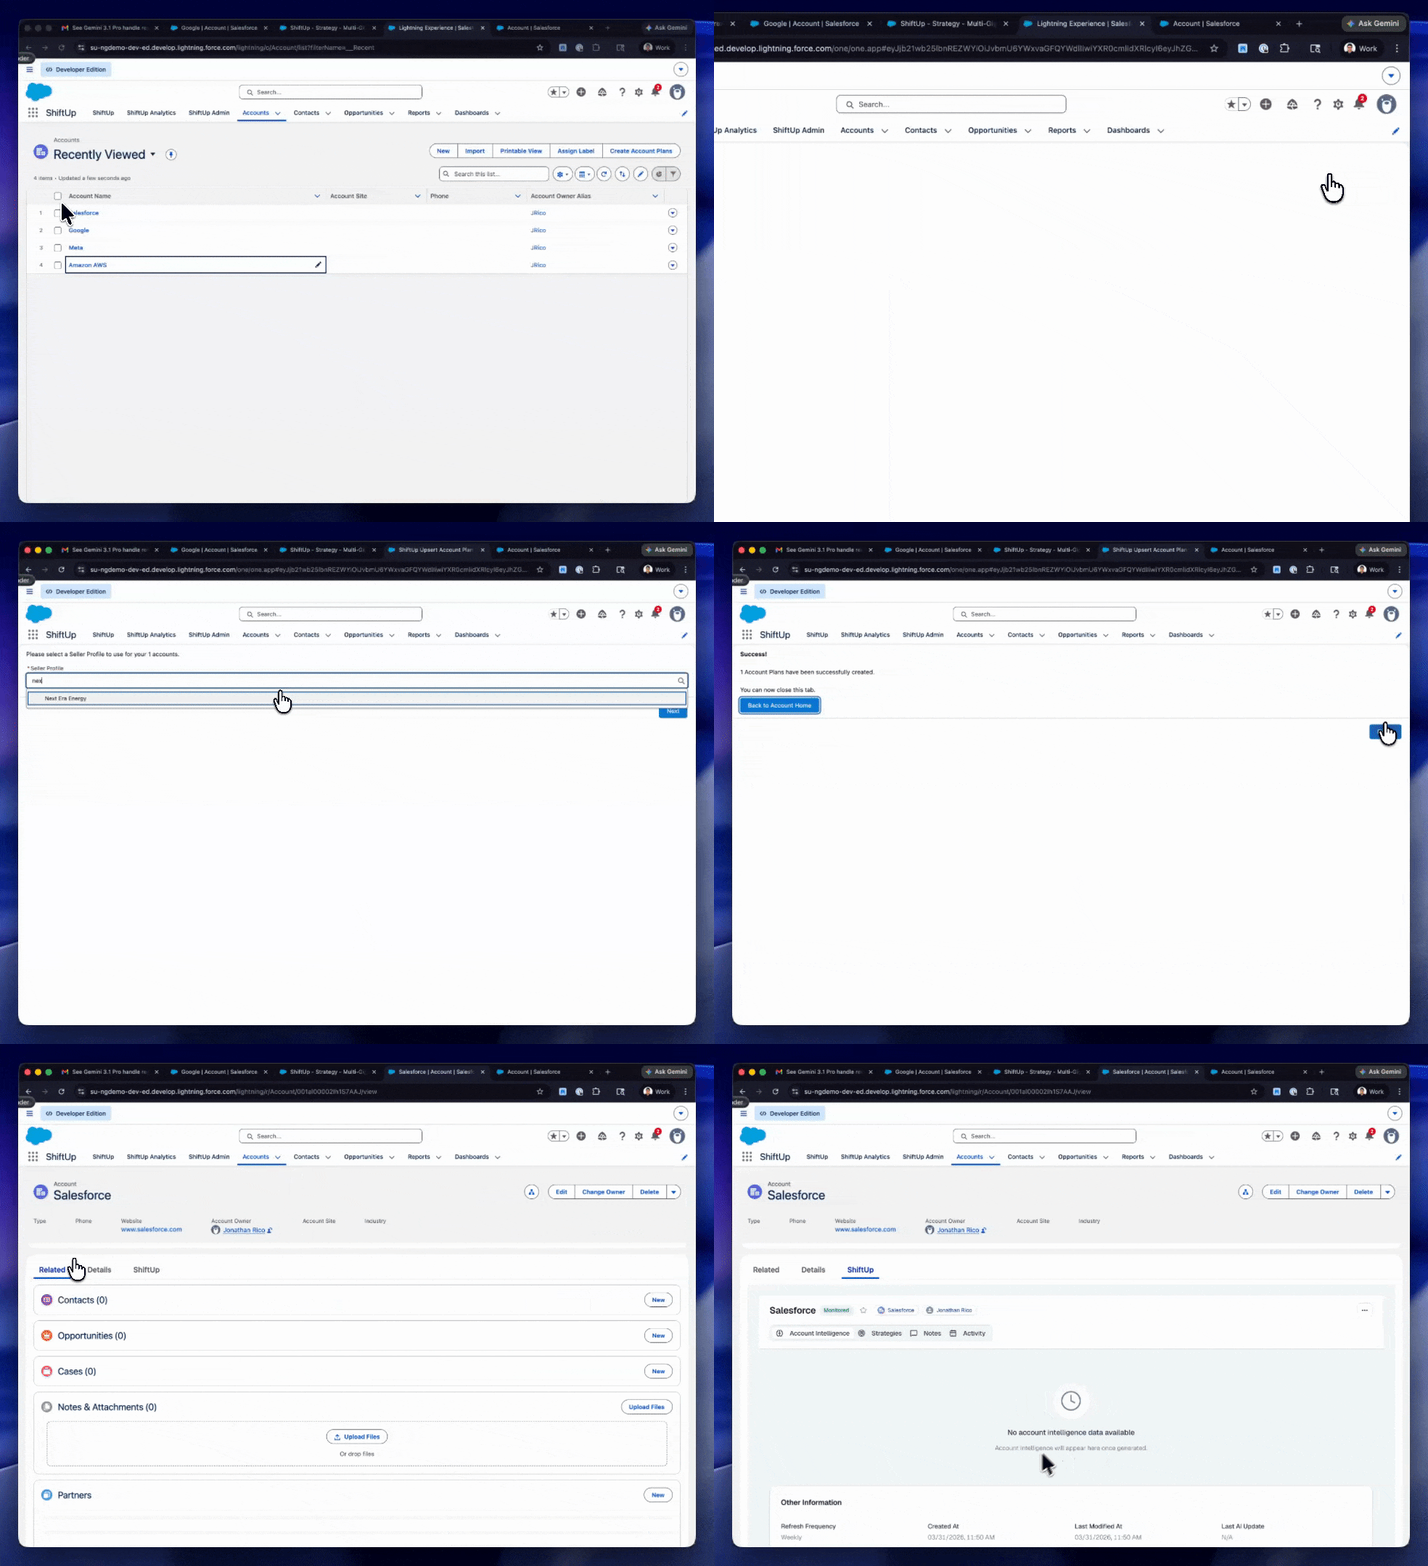
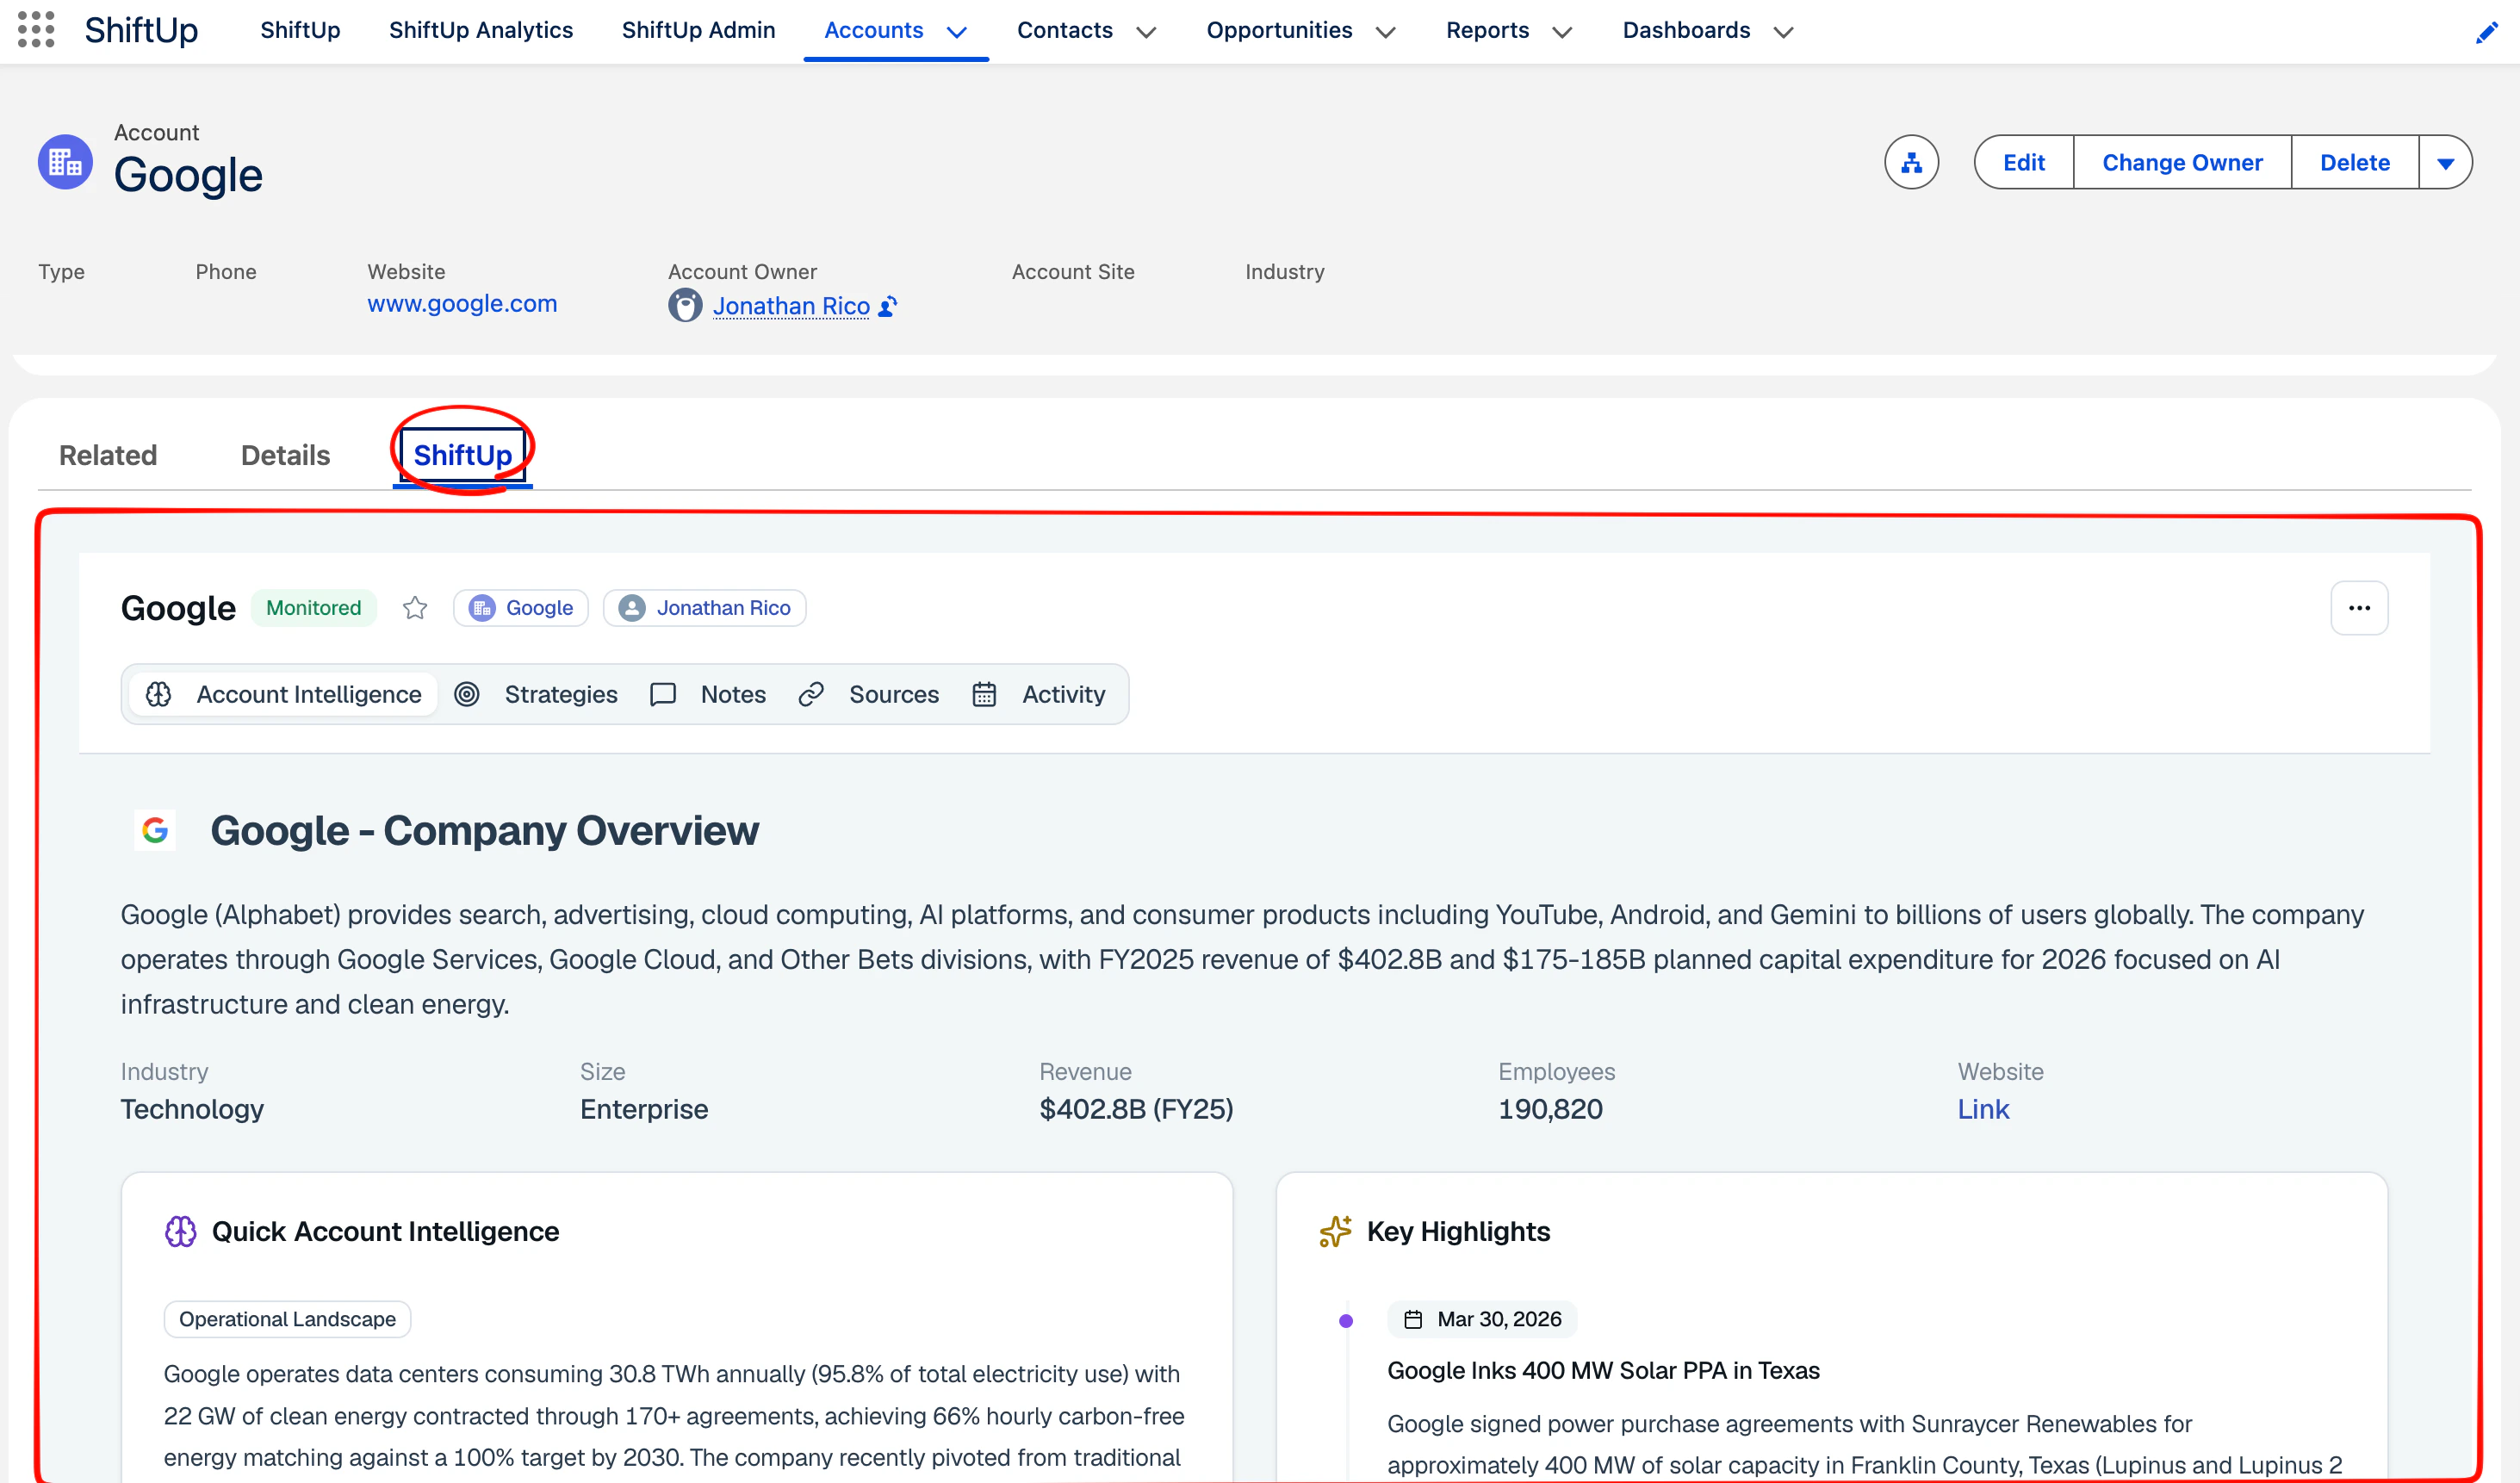
 ShiftUp should now be available in the Account record page:
 ## Update Opportunity Record Page
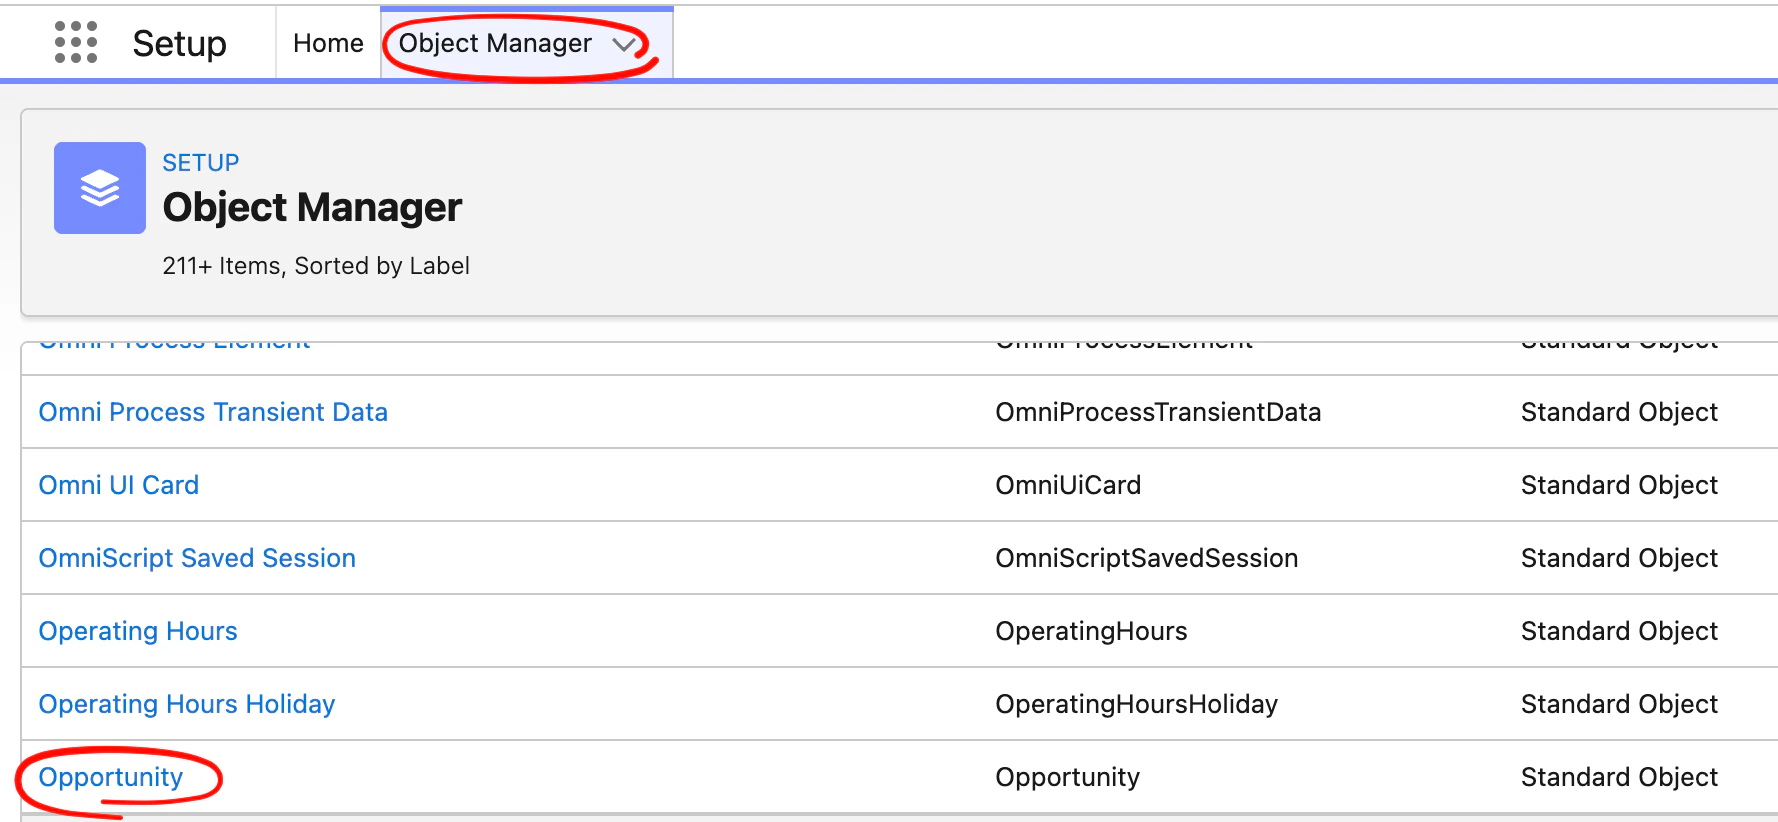
Go to `Setup` , then click on the `Object Manager` tab and click on the `Opportunity` object.
## Update Opportunity Record Page
Go to `Setup` , then click on the `Object Manager` tab and click on the `Opportunity` object.
 Next, open the Opportunity record page where you would like to display ShiftUp strategy details
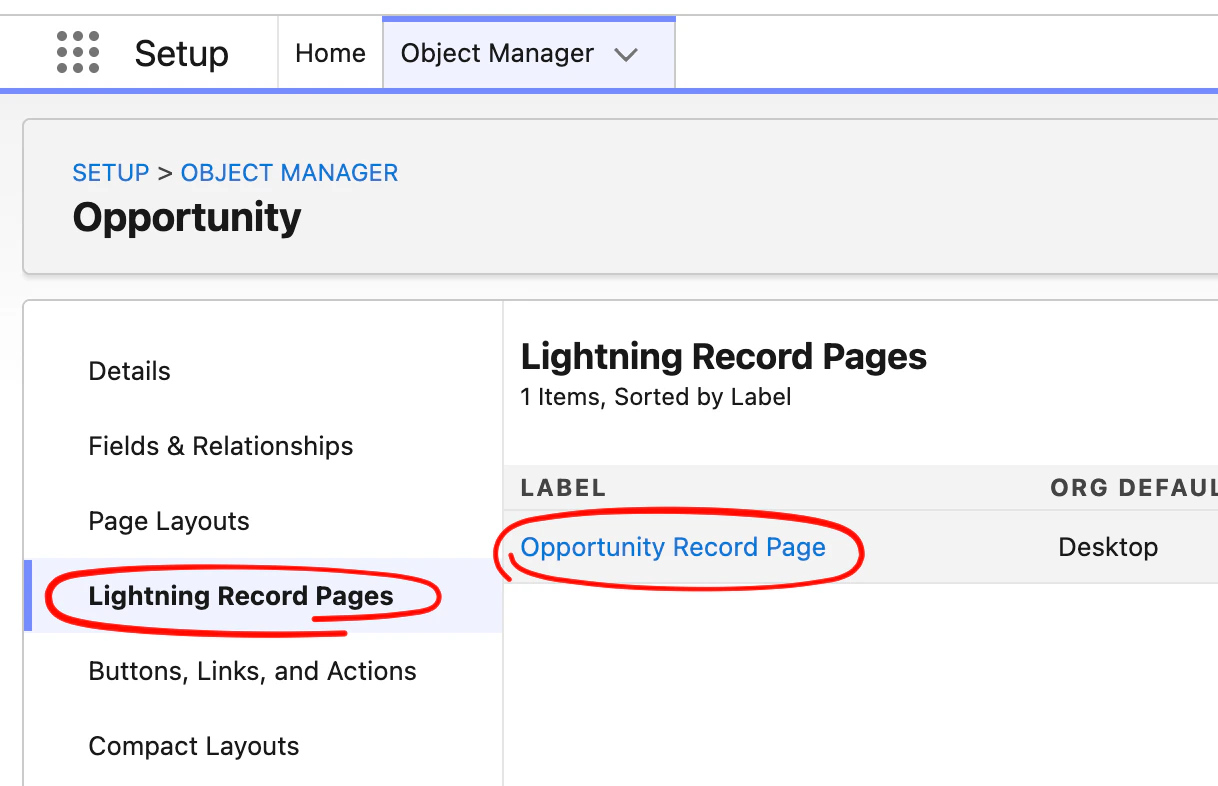 And click the `Edit` button
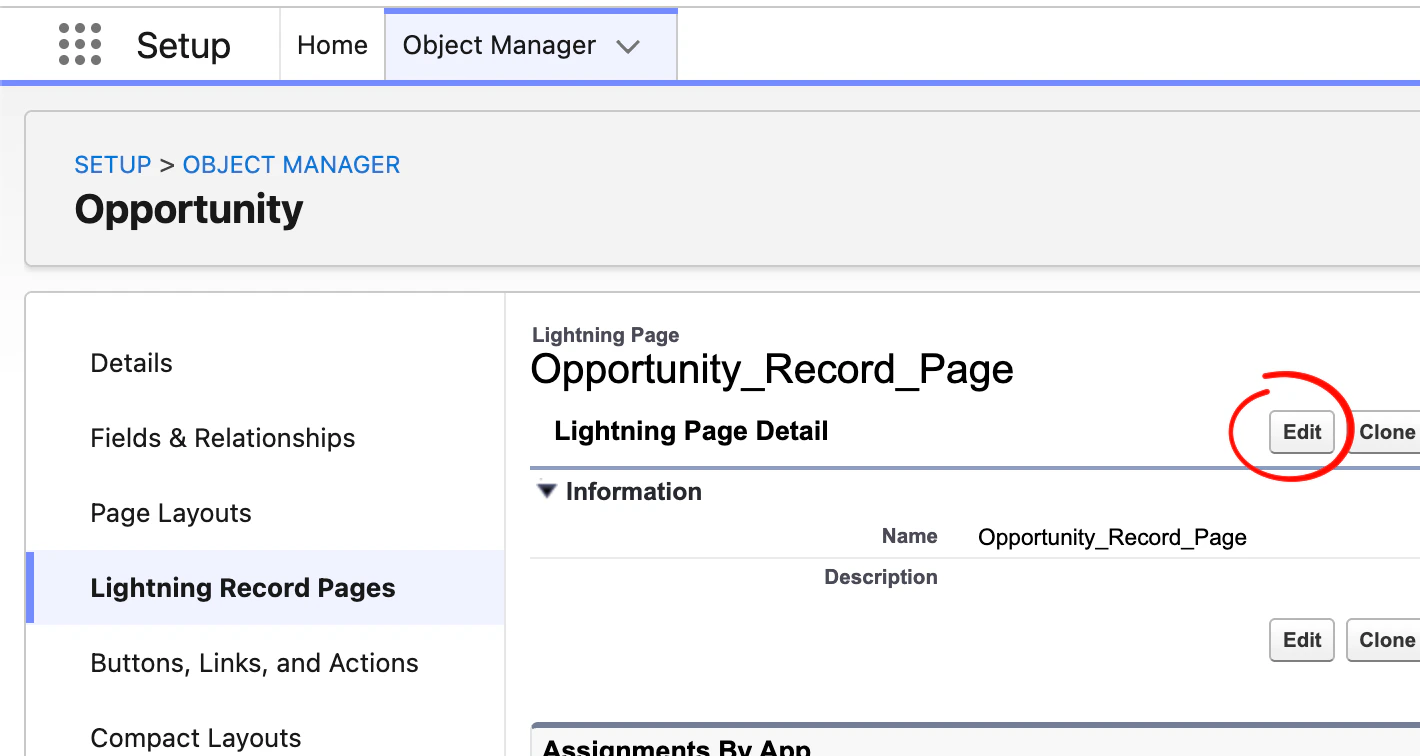 This will take you to the Lightning App Builder to edit the Opportunity record page. Record pages are very different for each business, so yours may look different. We want to add the `ShiftUp Opportunity Strategy` component to this record page, you can decide where you want to add this but we recommend creating a new tab for ShiftUp and dropping the component here.
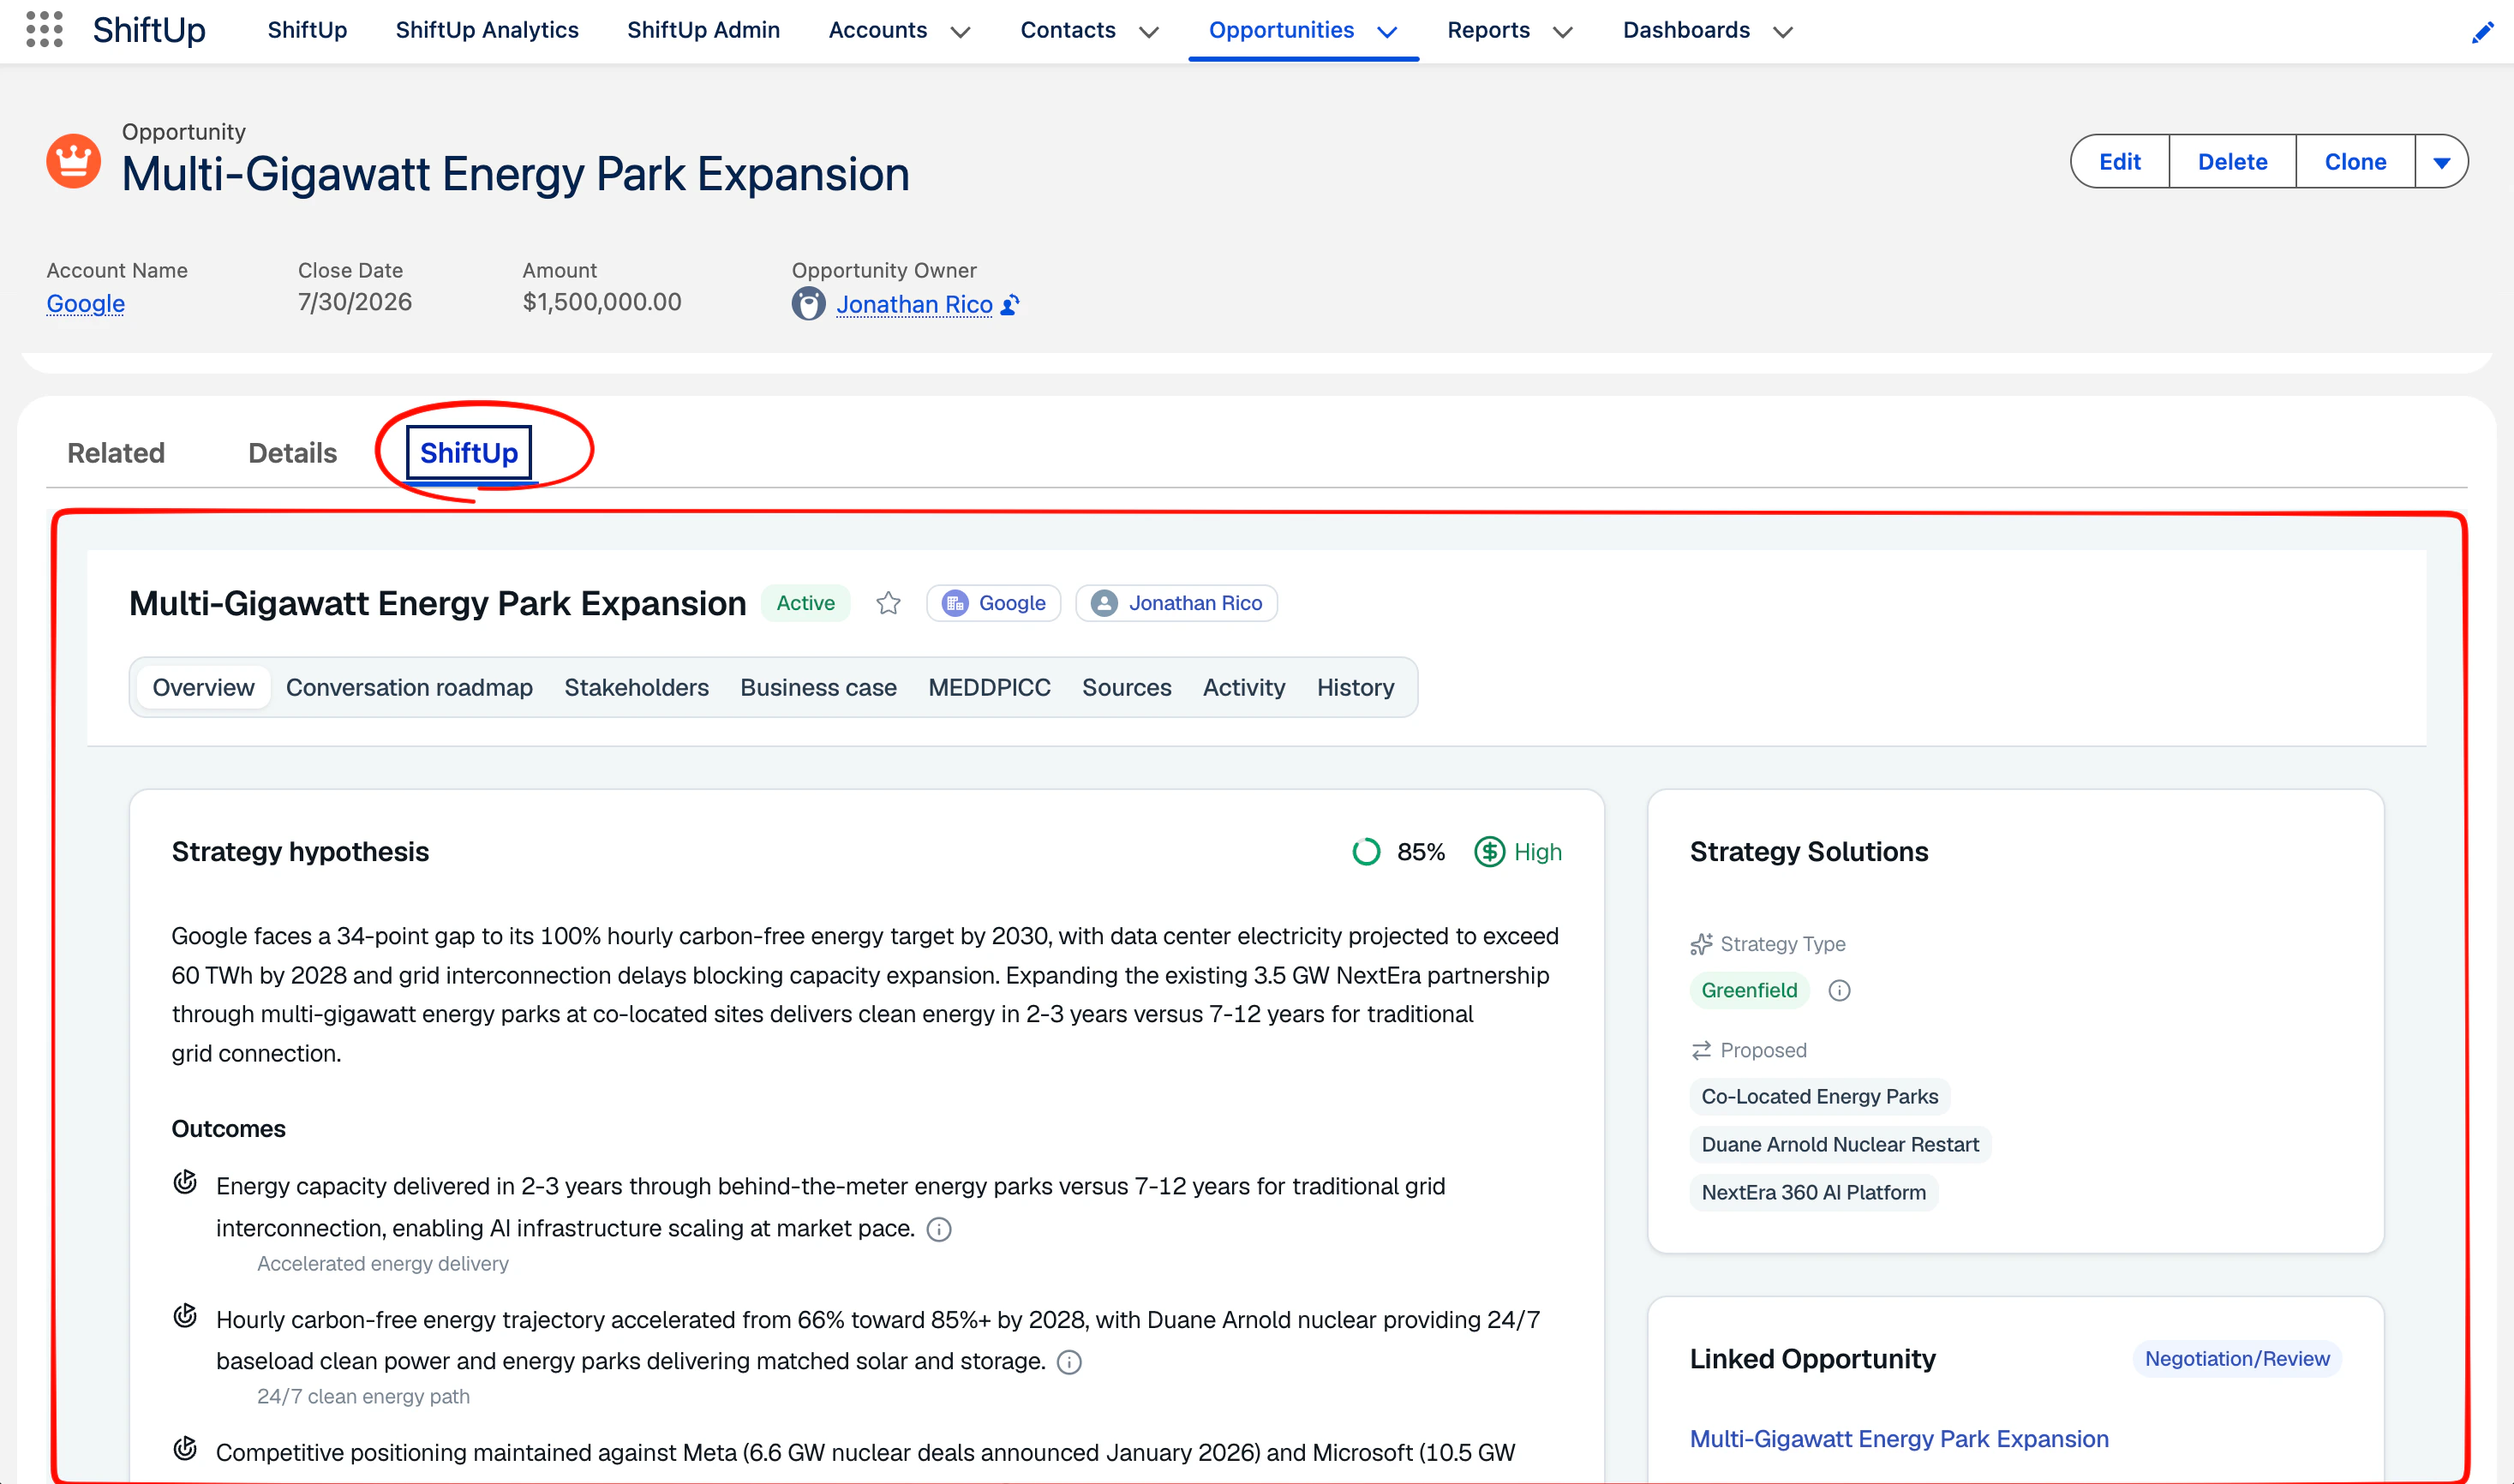
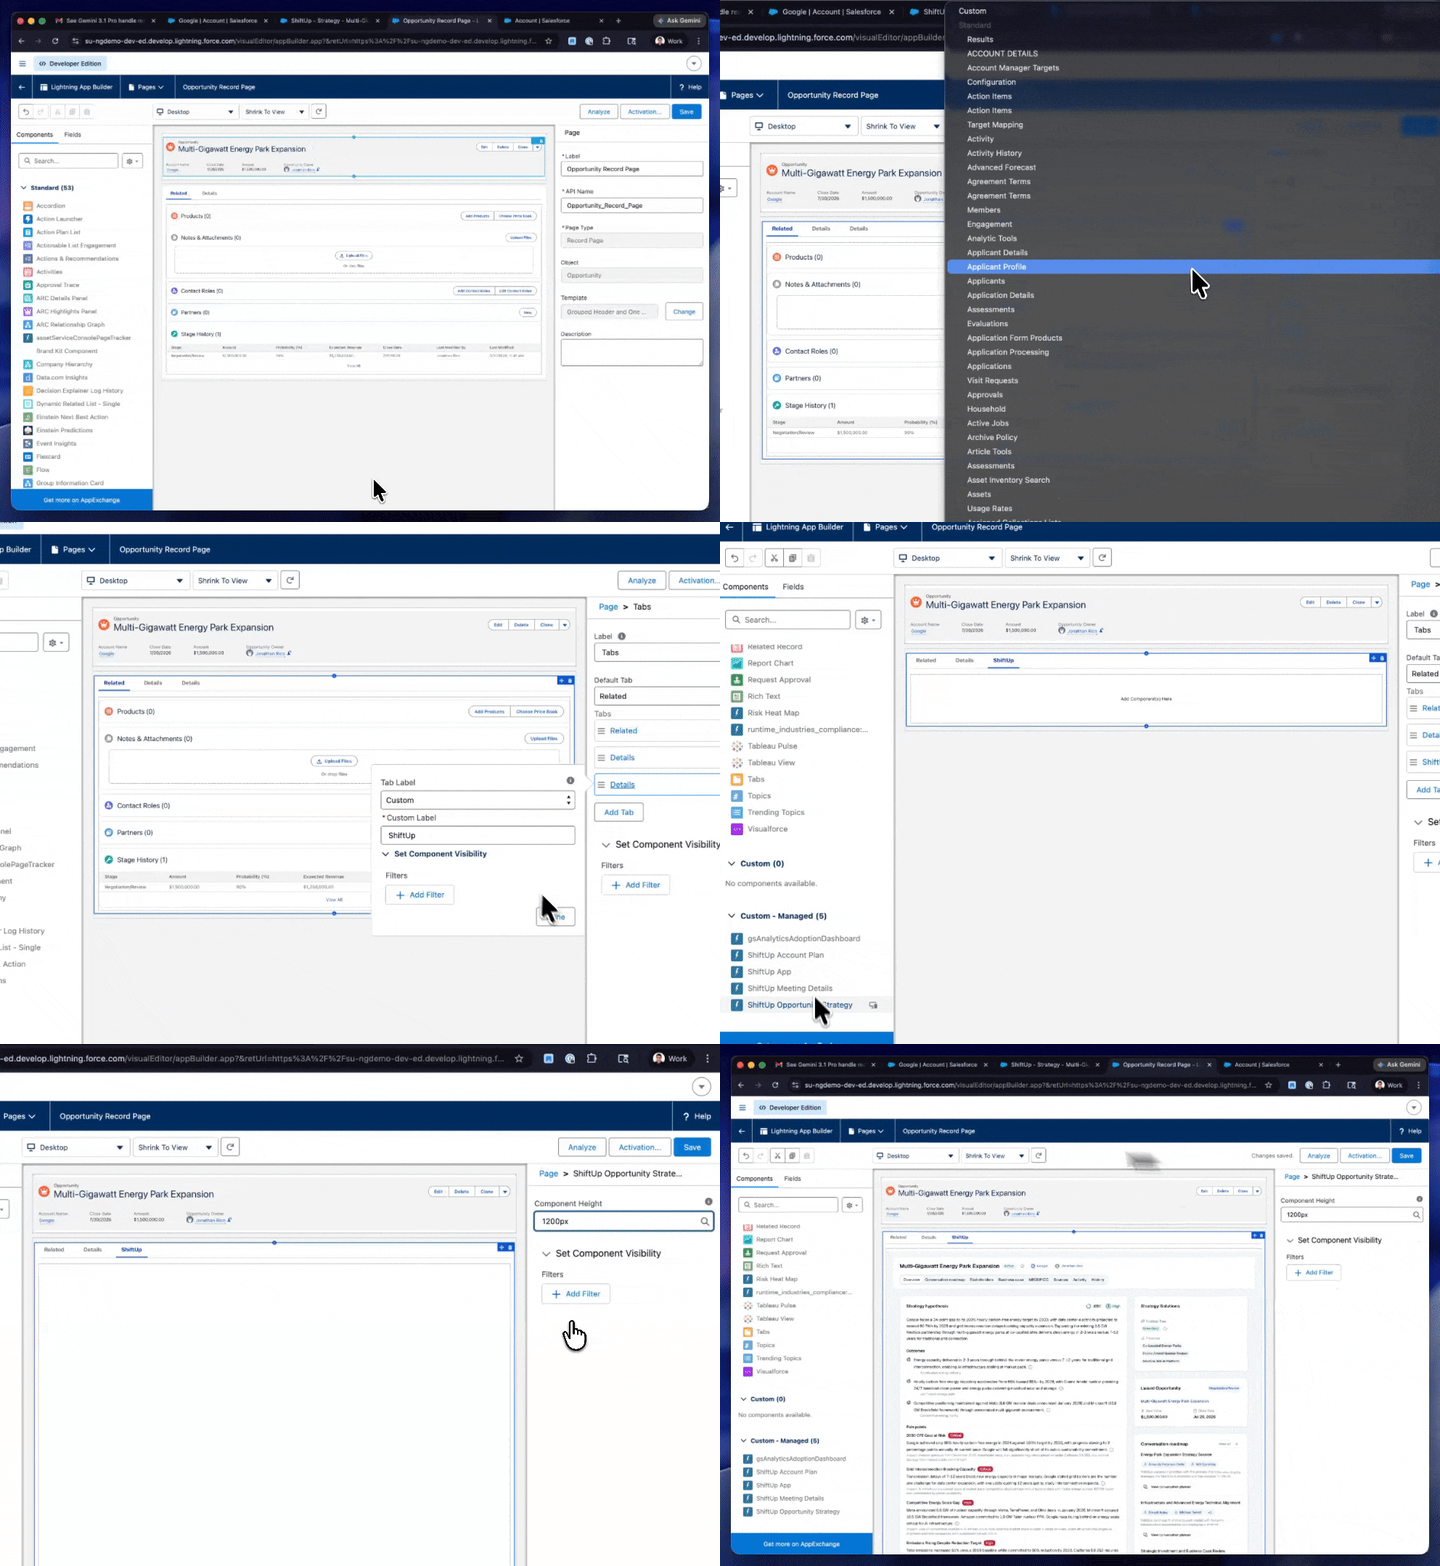 ShiftUp should now be available in the Opportunity record page:
 ## Enabling Account Plan creation from the Account list view
It is also possible to add create account plans directly from the Accounts list view instead of doing it through the Seller Profile screen inside of the ShiftUp app. To do this, we have to enable a new list view button in the Accounts object.
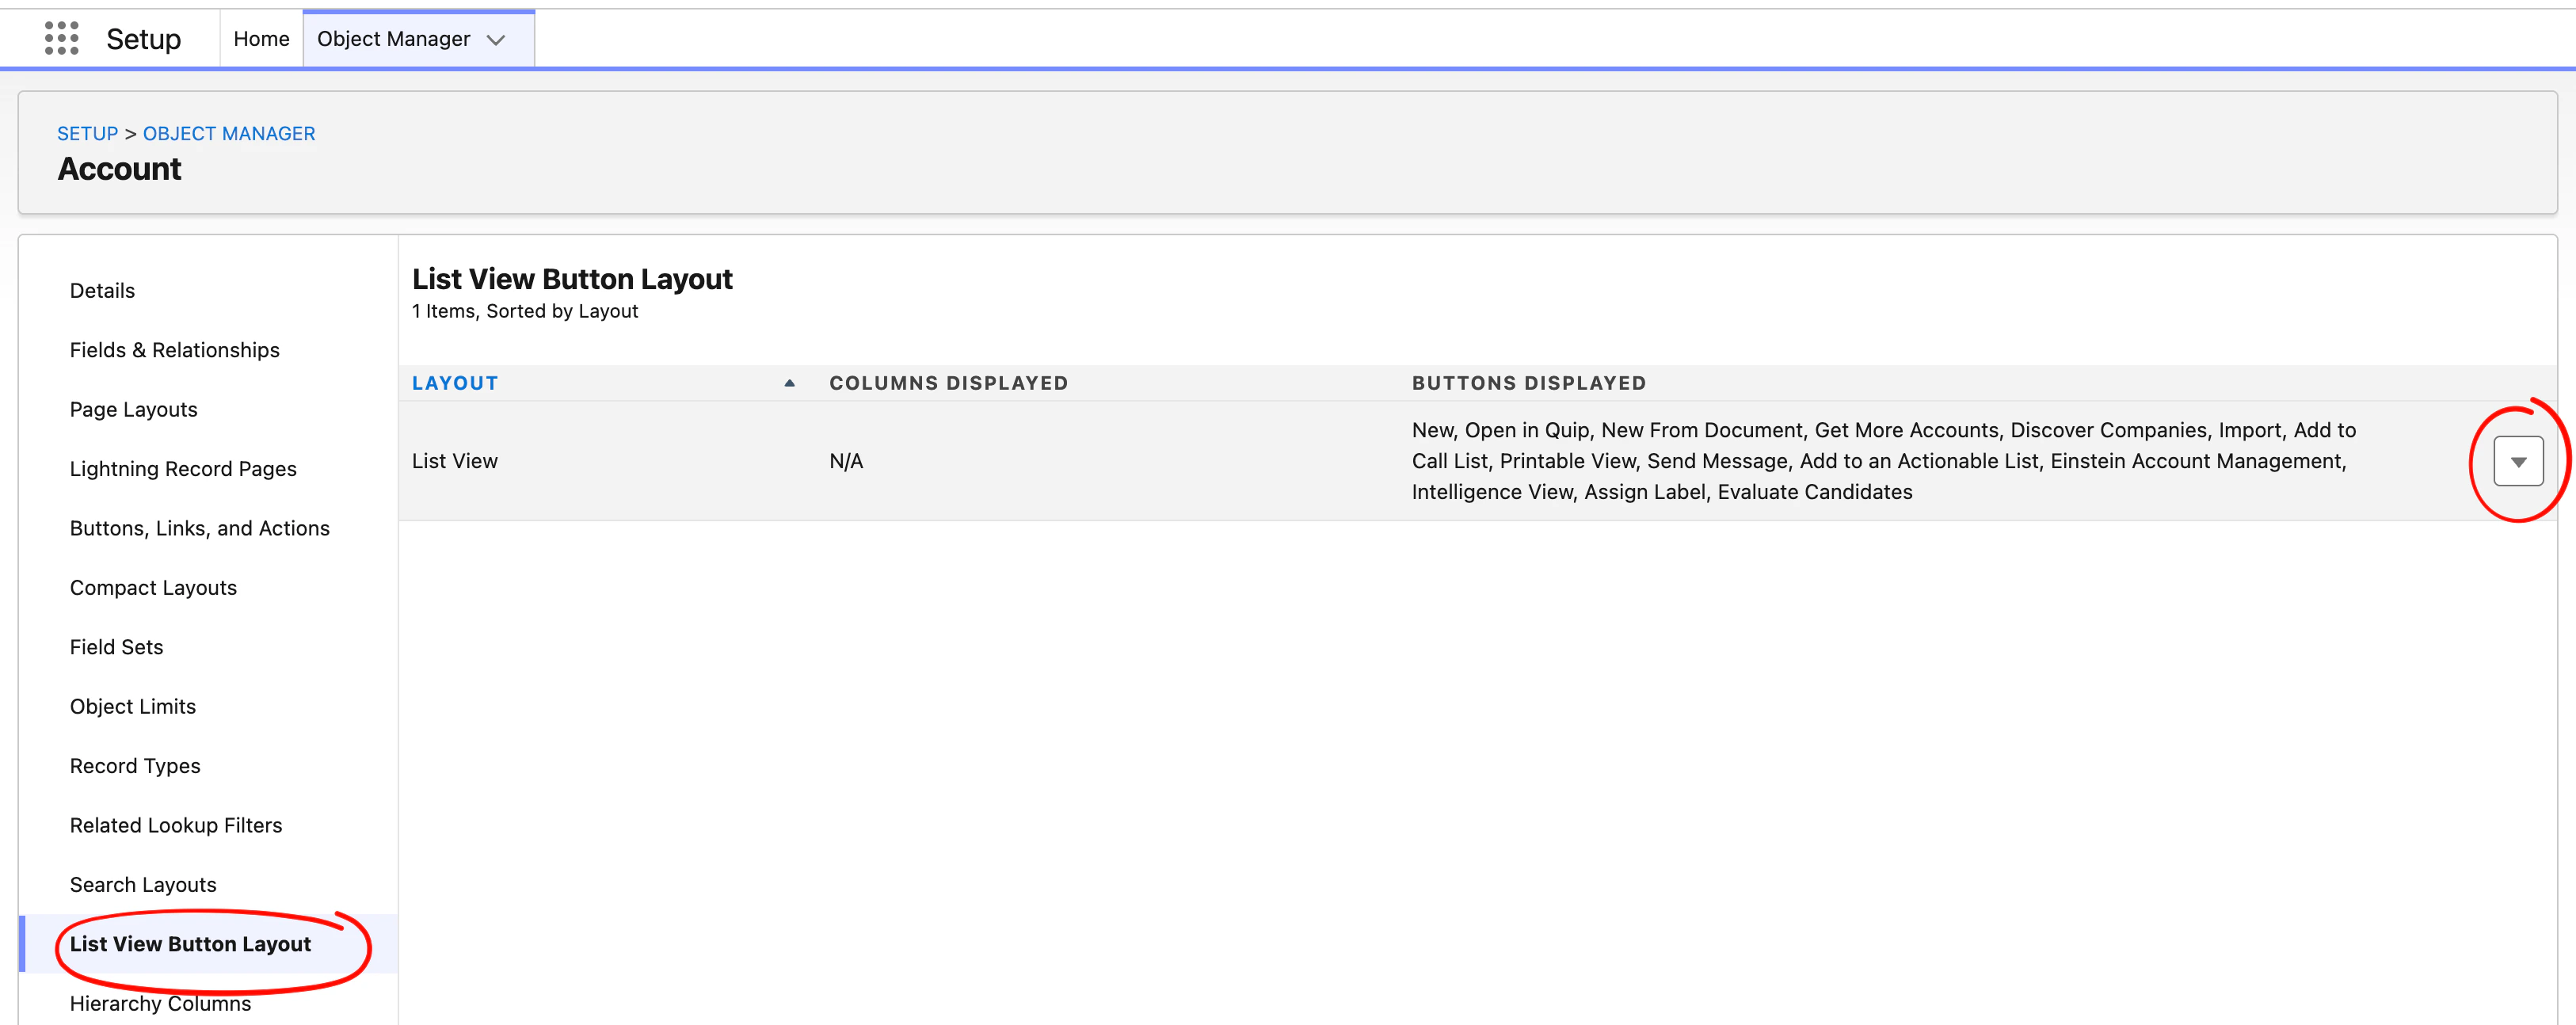
Go to `Setup` , then click on the `Object Manager` tab and click on the `Account` object.
Next, go to the `List View Button Layout` section and click the dropdown button next to the list view row.
## Enabling Account Plan creation from the Account list view
It is also possible to add create account plans directly from the Accounts list view instead of doing it through the Seller Profile screen inside of the ShiftUp app. To do this, we have to enable a new list view button in the Accounts object.
Go to `Setup` , then click on the `Object Manager` tab and click on the `Account` object.
Next, go to the `List View Button Layout` section and click the dropdown button next to the list view row.
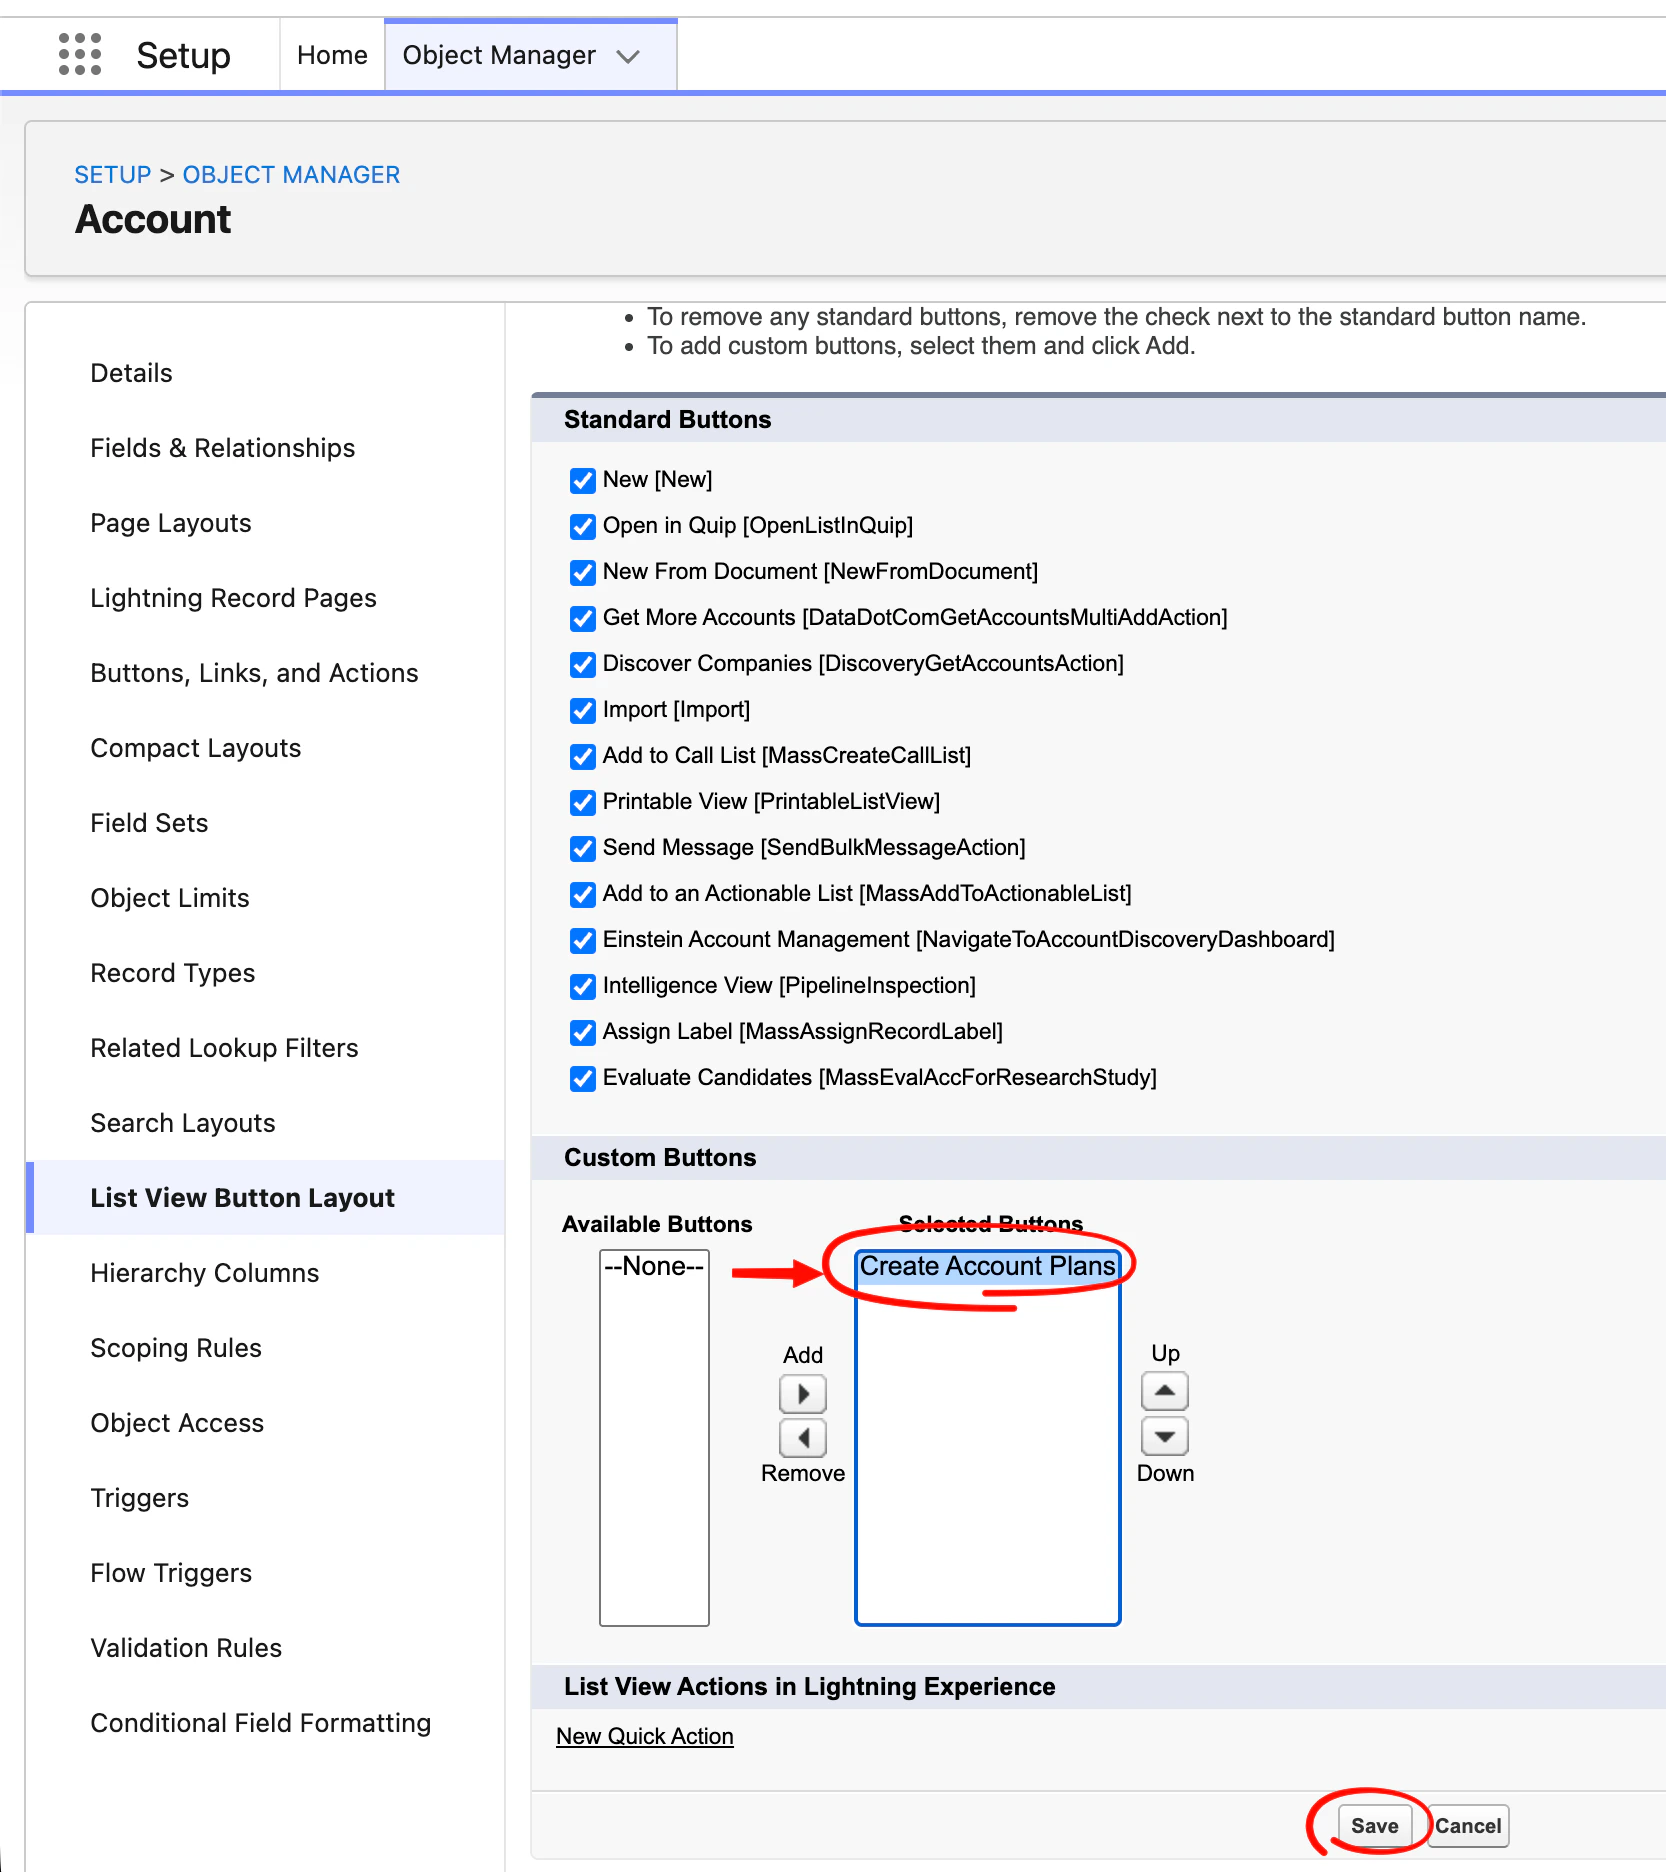
 In the List View button edit screen, add the `Create Account Plans` button to the list of Selected Buttons and then click `Save`
 You should now be able to create Account Plans directly from the Account list view by selecting accounts and clicking the `Create Account Plans` buttons in the list view.